Nuclear
Weapons
Platform
Airbrush
PURCHASED:
071109
BEGUN:
071117
COMPLETE:
CONSTRUCTION
LOG
071109
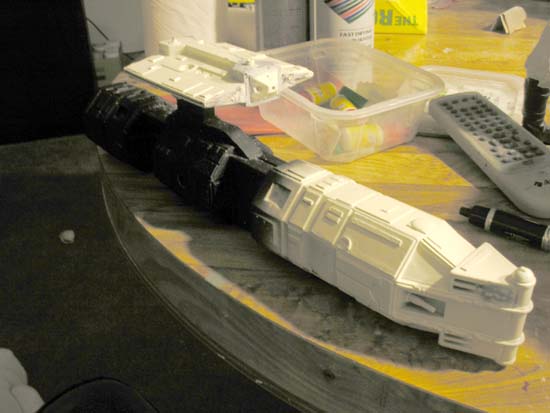
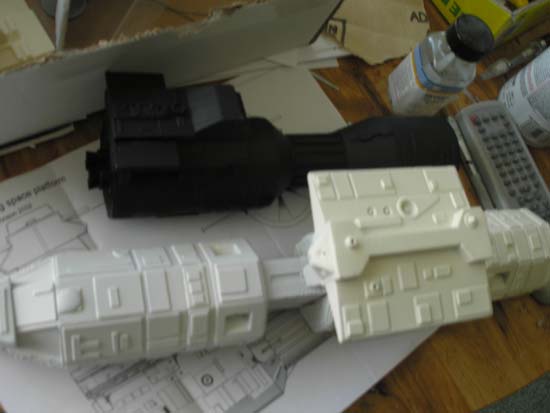
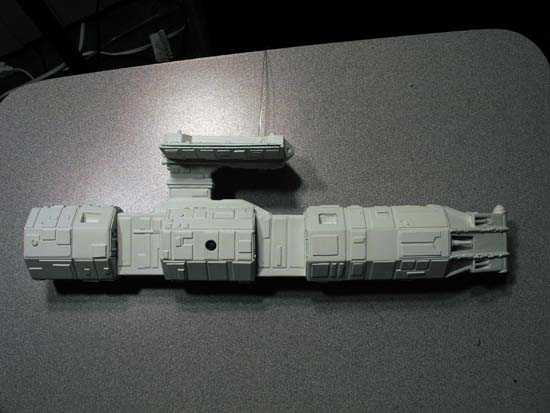
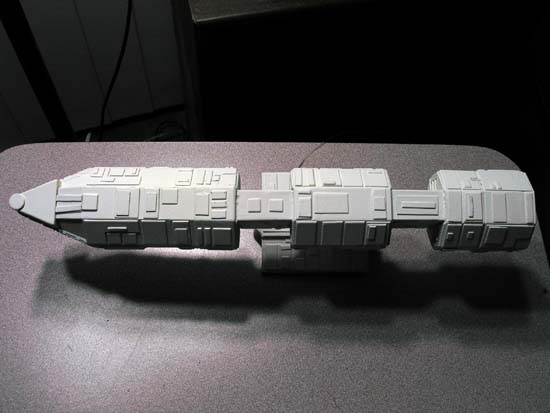
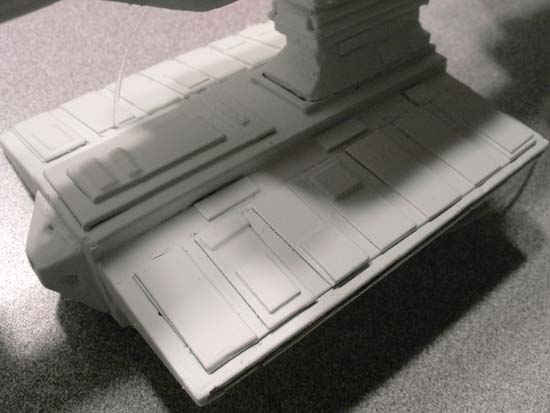
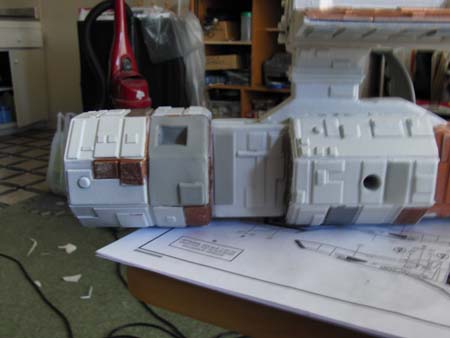
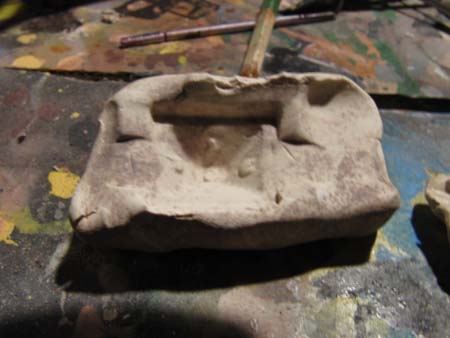
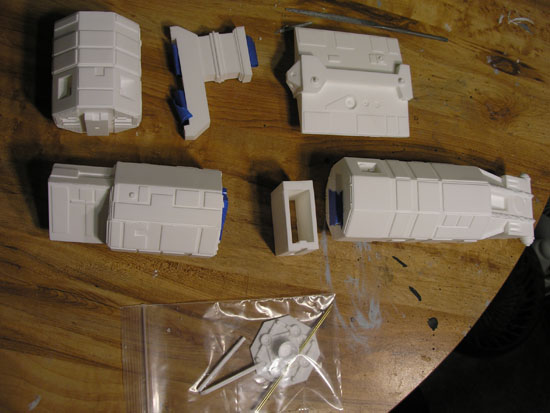
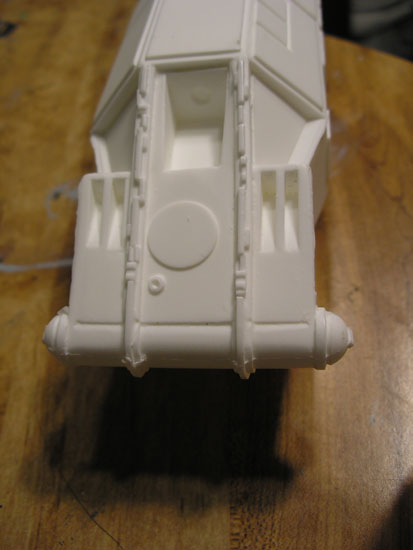
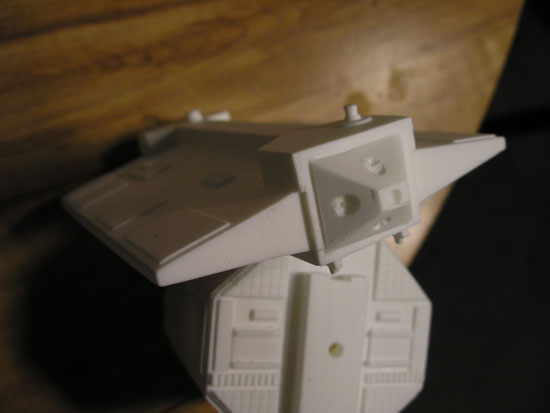
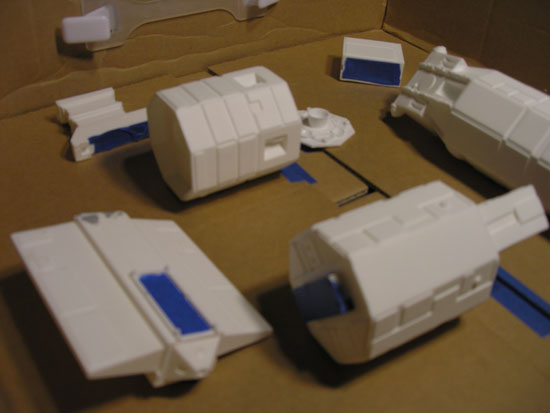
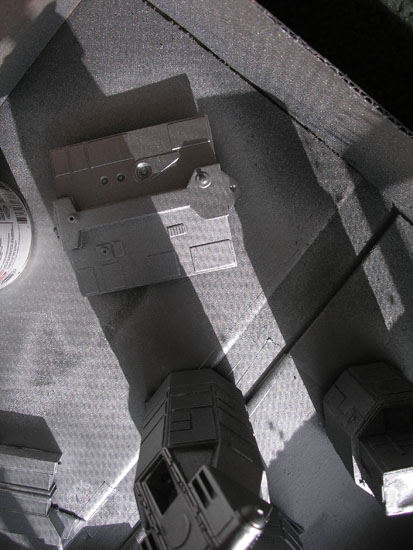
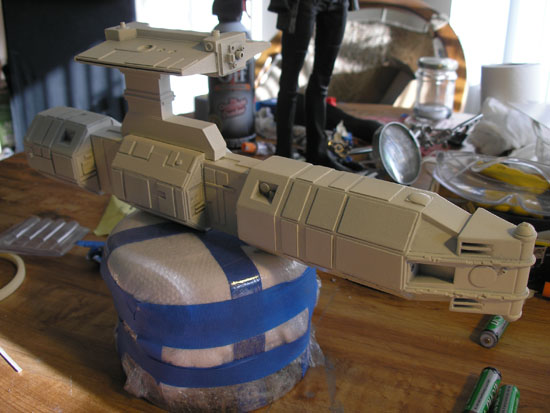
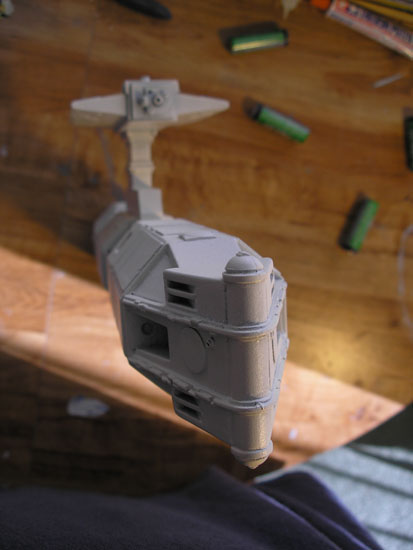
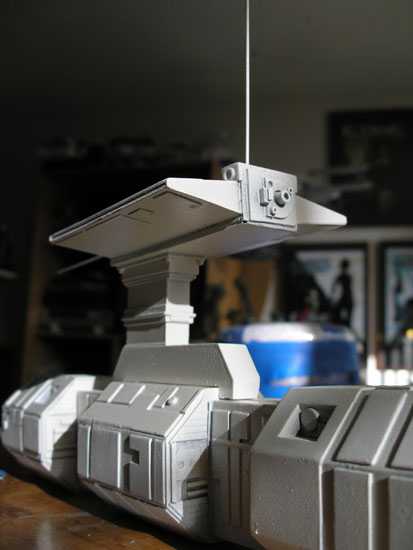
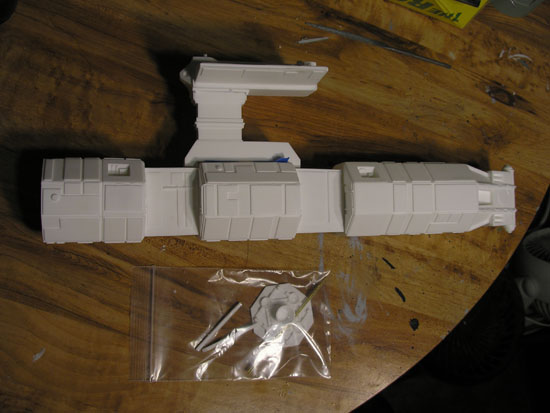
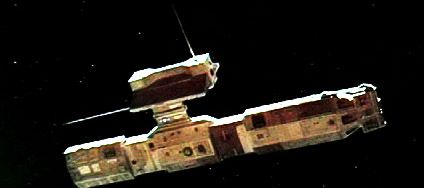
Made by Mad Dog Resin. A few garage builders are filling in the complement of all the ships seen in
2001 ASO. This is my top favorite of the five nuclear platforms.
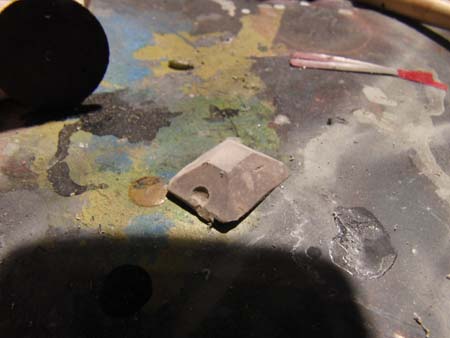
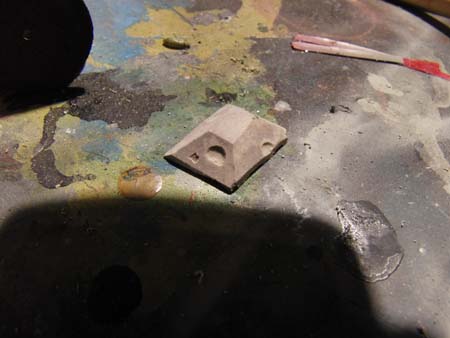
071117.18
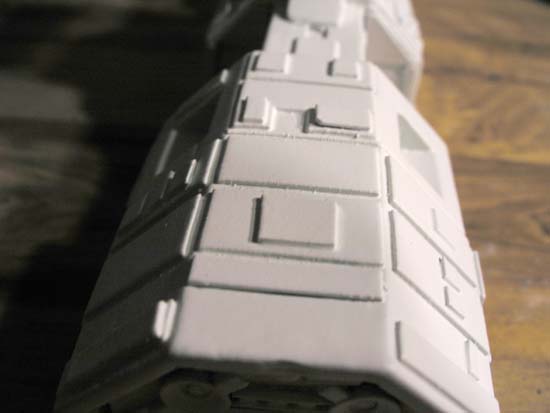
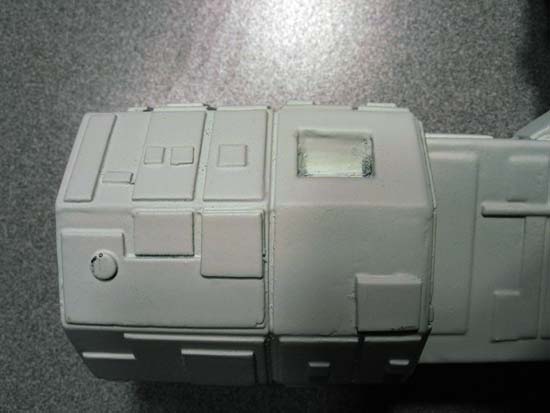
Nice! Sharp details. Minimal to non-existent flash. TIght fit on all parts. Removing the conning tower and creatinga handle would make this into a cool gun. Maybe I'll be able to get a 2nd one months from now.
071117.22
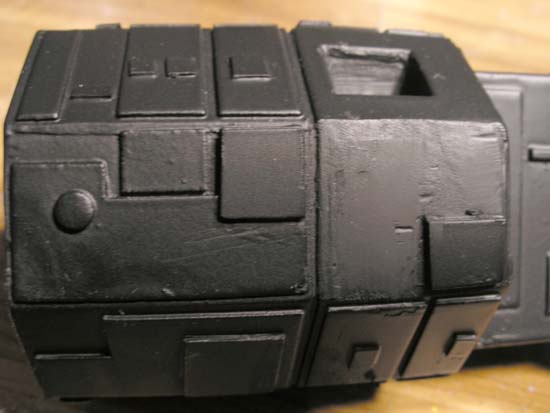
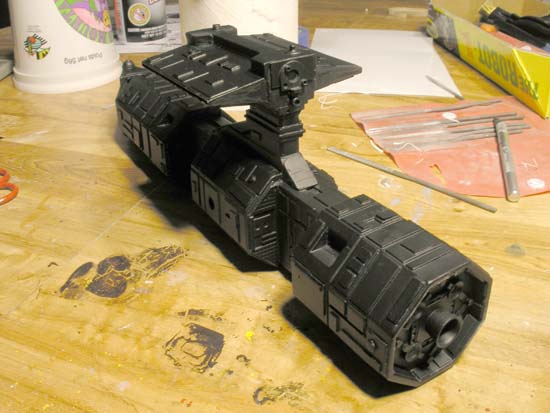
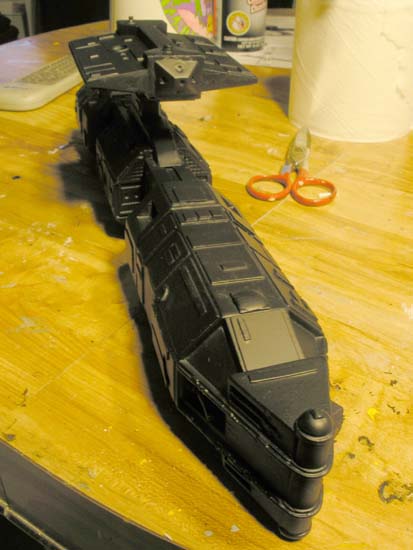
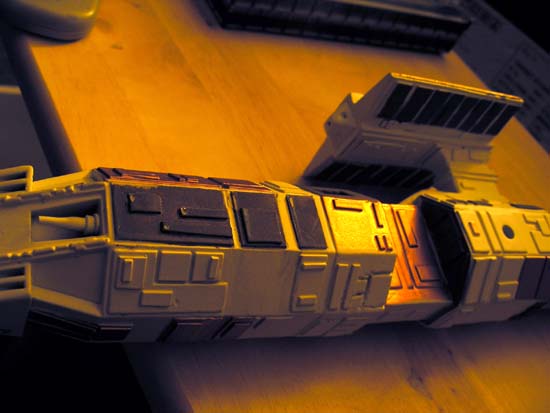
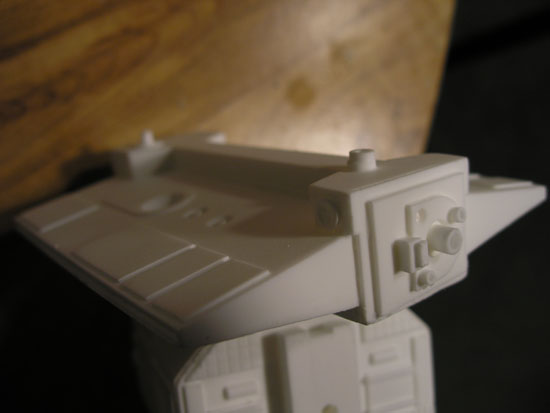
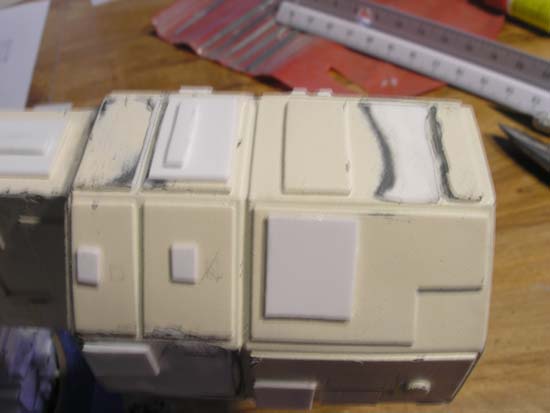
Had another good look over.
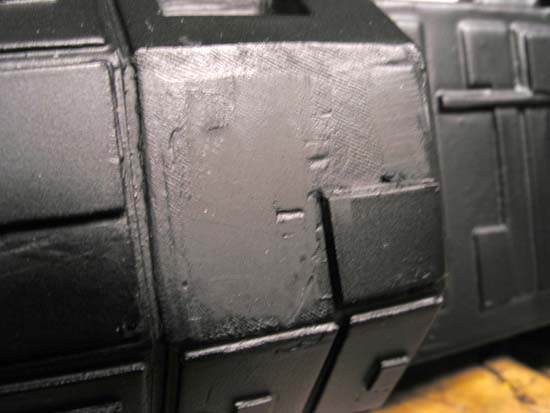
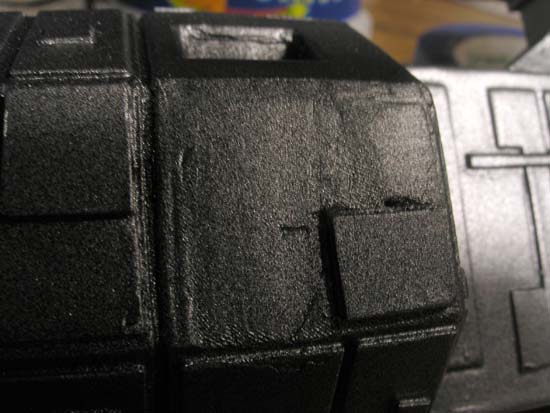
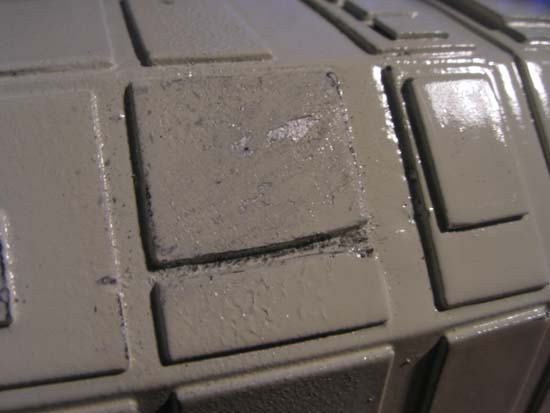
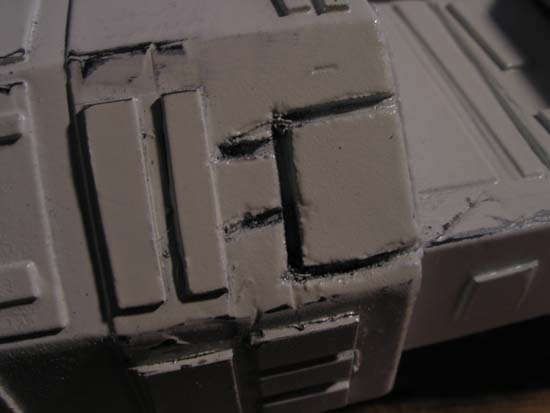
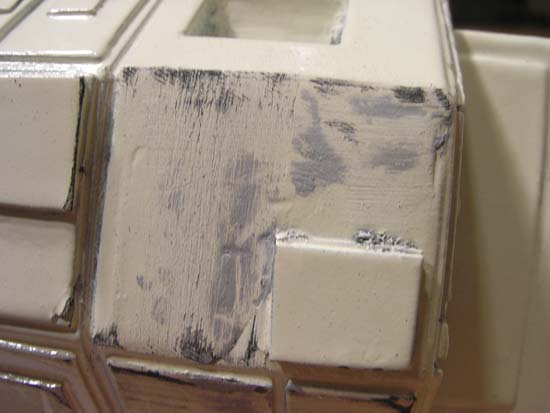
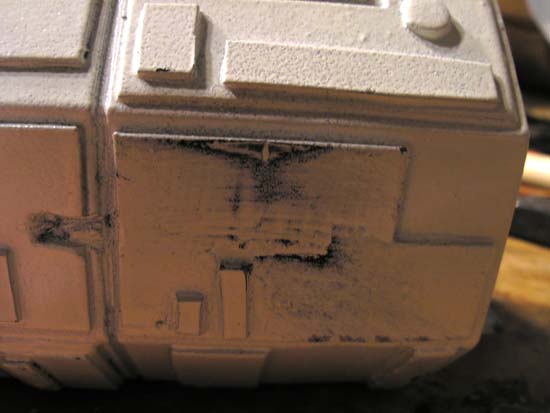
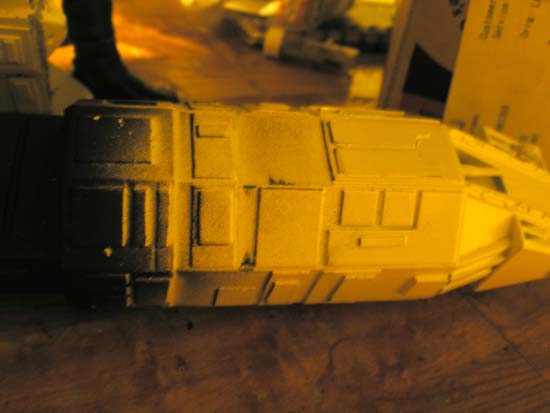
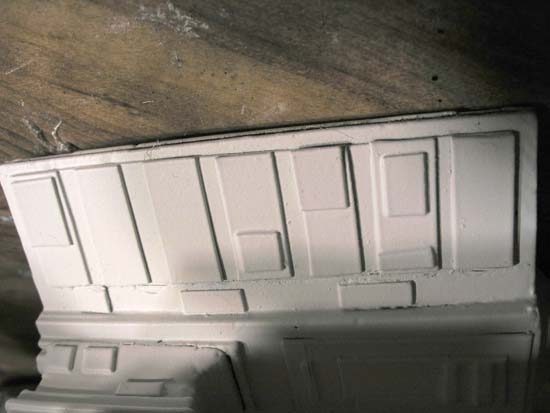
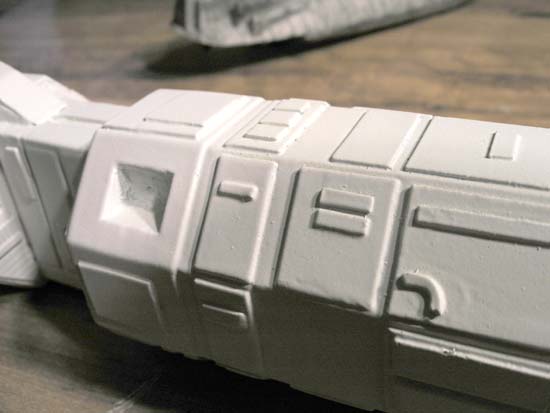
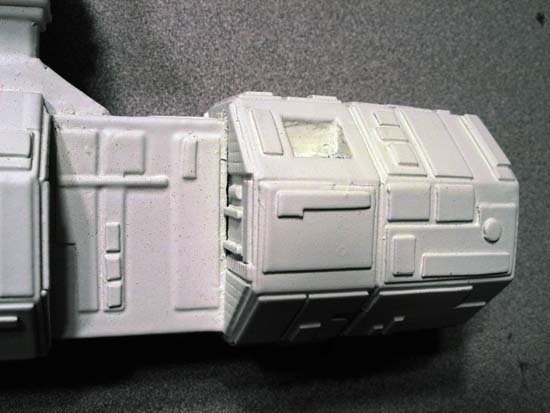
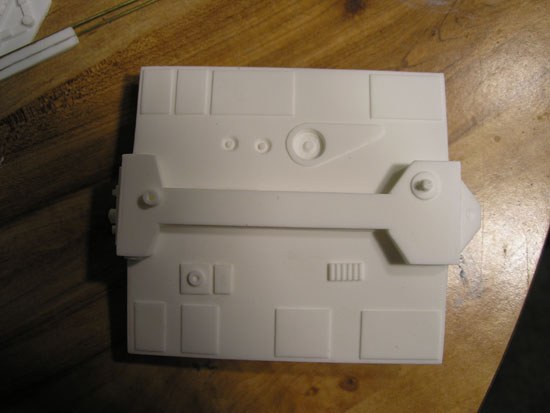
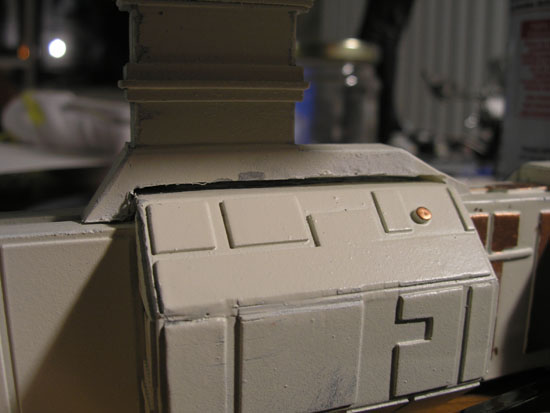
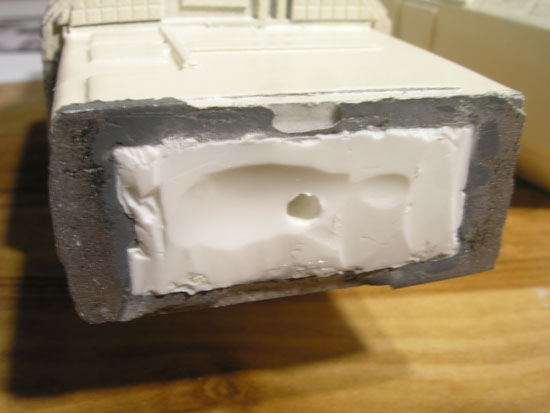
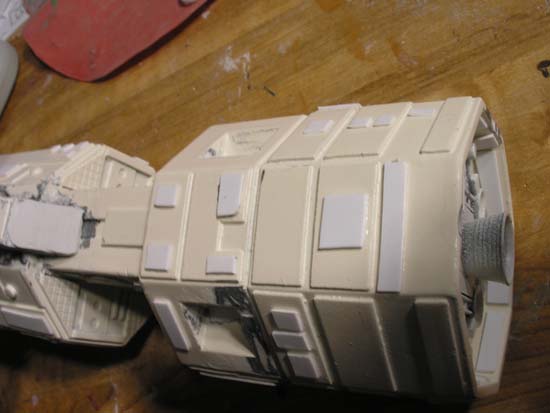
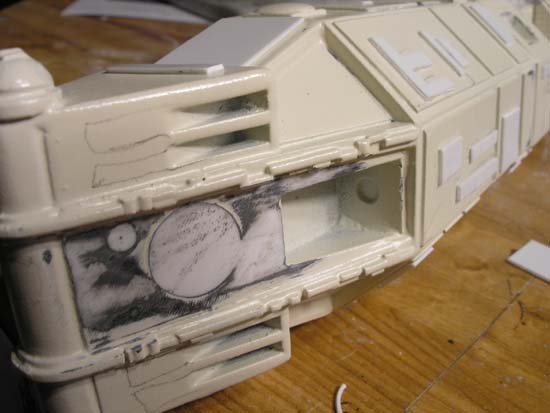
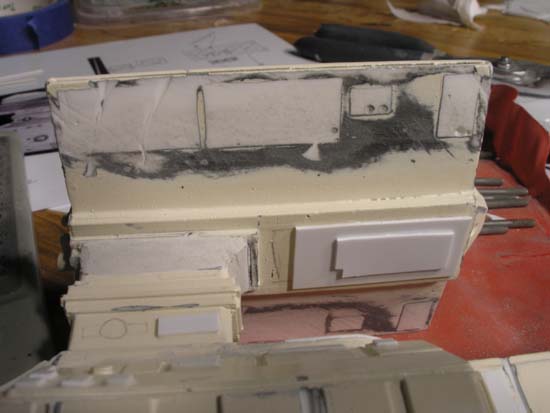
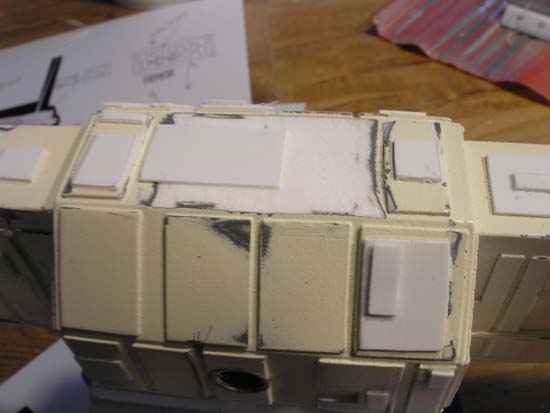
Cleaned a few last lines of flash. Found a few soft panel lines. FInally found two bubbles! They were essentially invisible being on the underside of the conning platform. I puttied them over, but that is it for this entire kit! It is ready to be washed and primed!
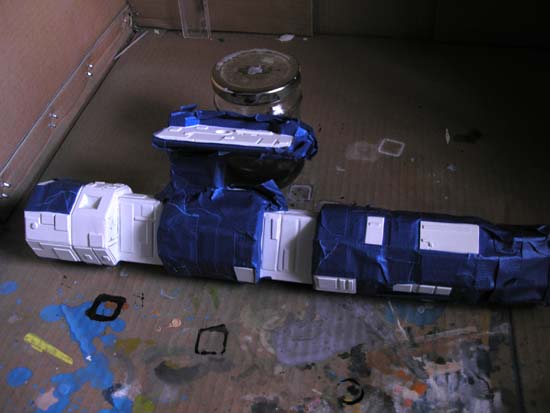
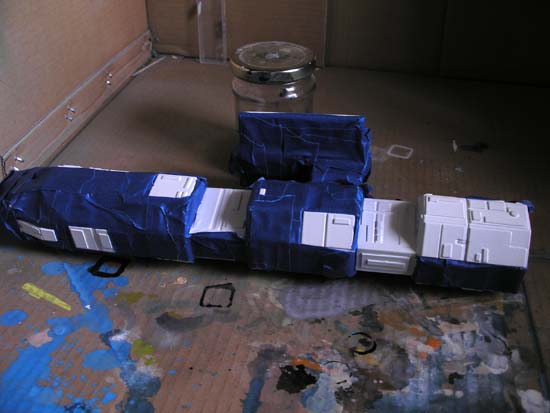
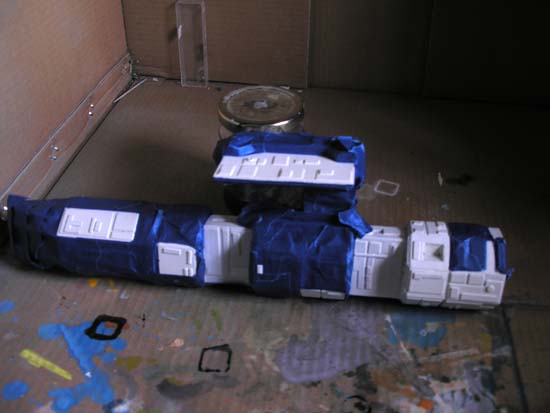
First up:
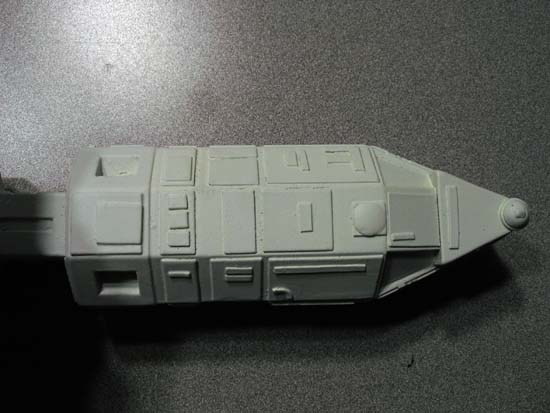
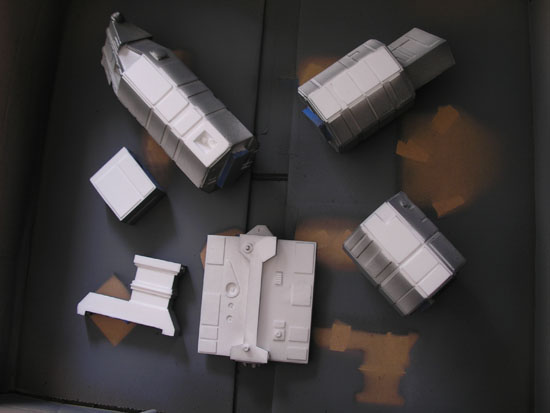
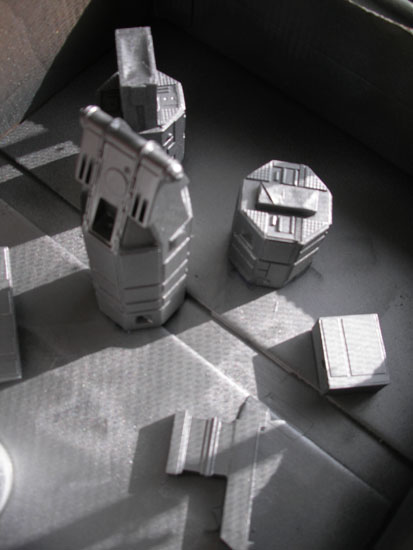
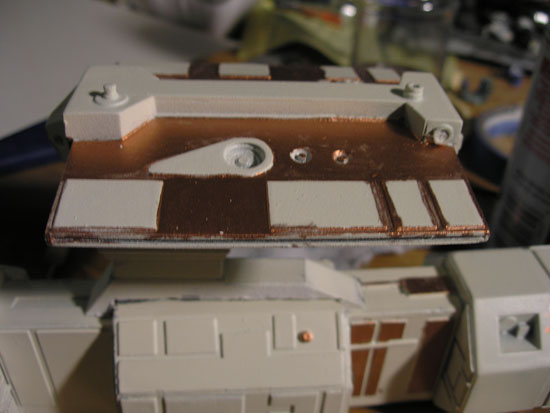
Black primer. Silver. Silver. Black. Rustoleum Heirloom White. Spot colors: Maroon and a rusty gold of some sort. Also, variant grey paneling. These last ones will all be airbrushed.
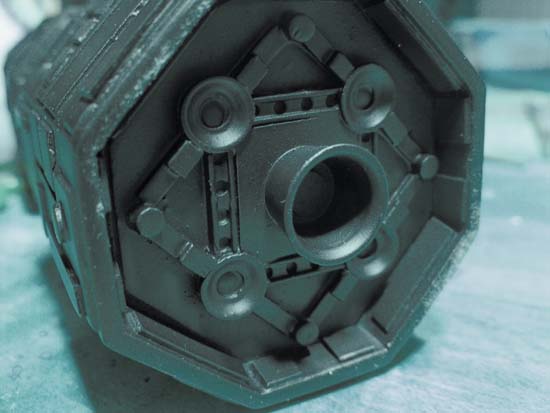
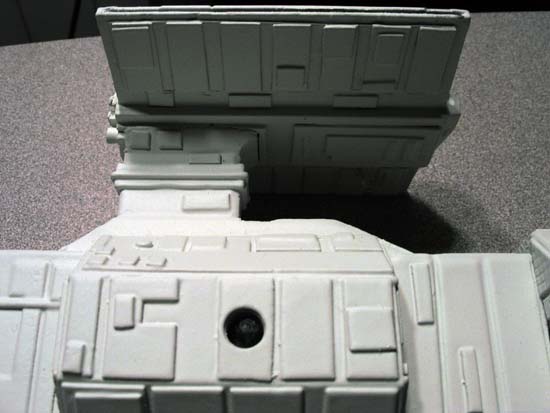
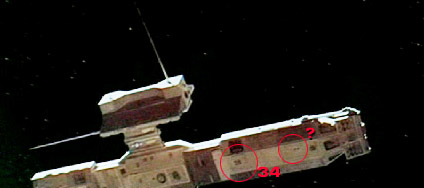
It looks like there's a window in the conning tower base on the film. I will have to serisously study the frames as best I can.
This kit just cut the work line and is at the front with some of the resin characters. This will fill some time while I wait on the CC D-7 next week.
Primer tomorrow all day long!
.23
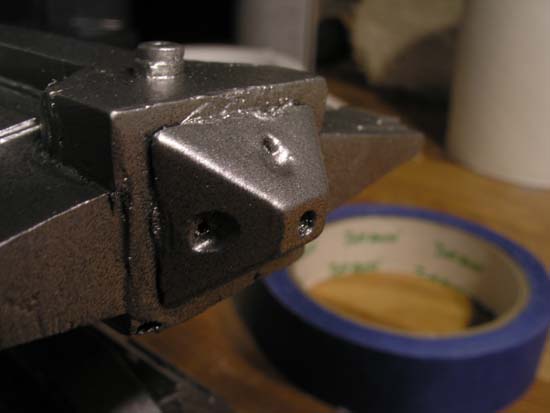
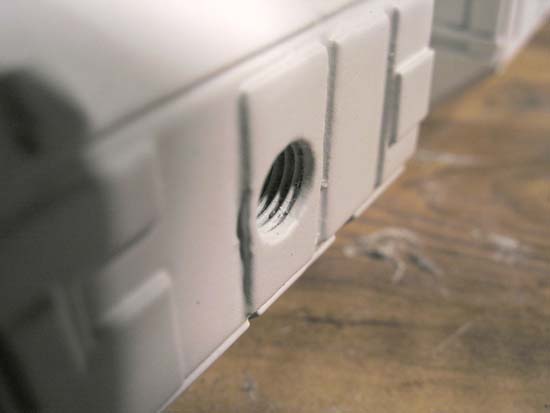
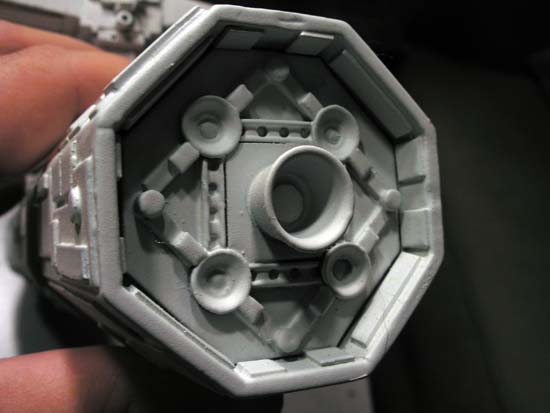
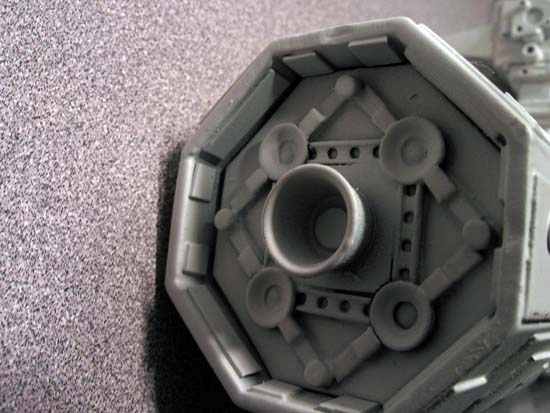
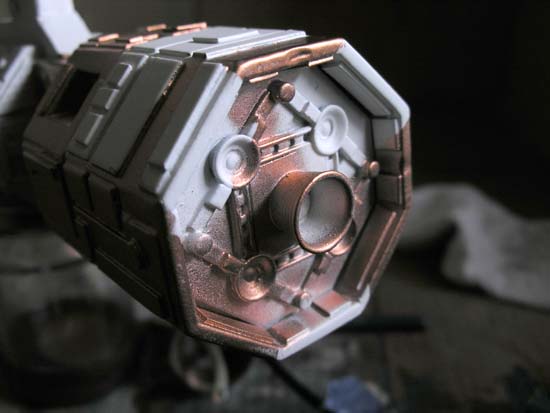
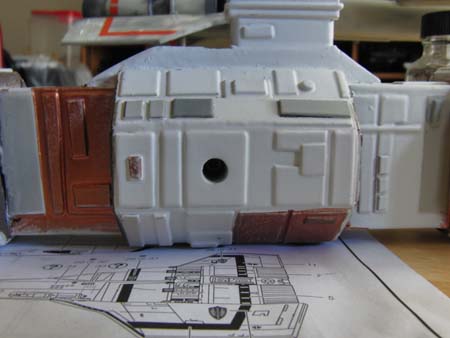
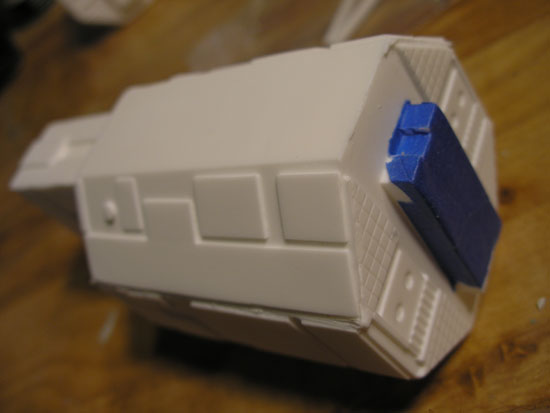
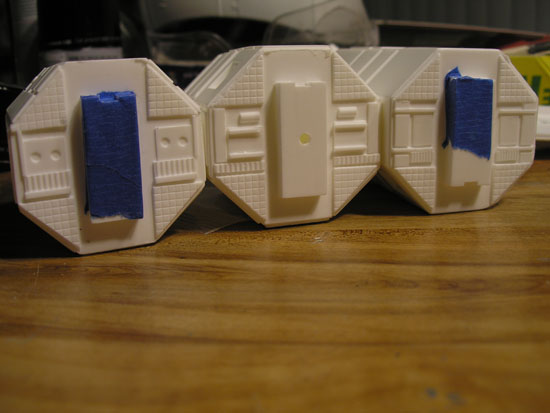
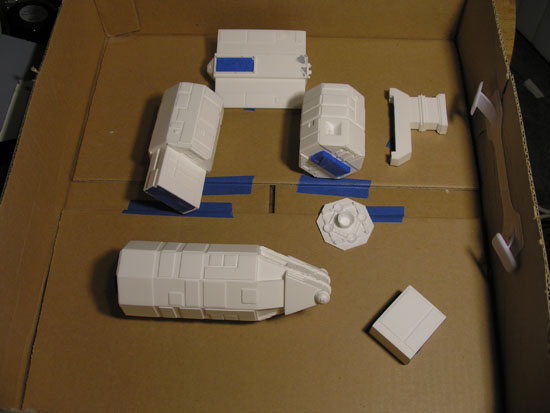
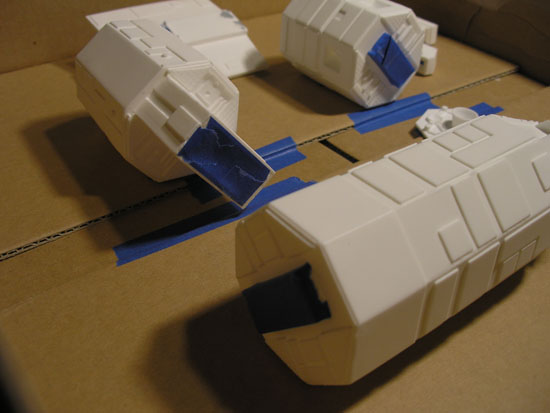
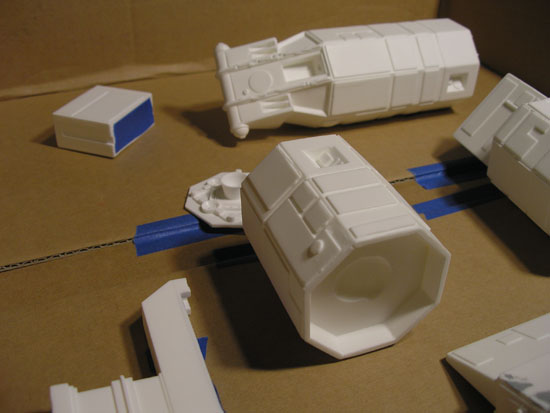
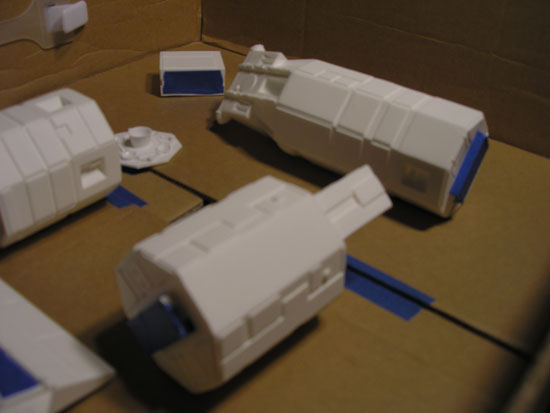
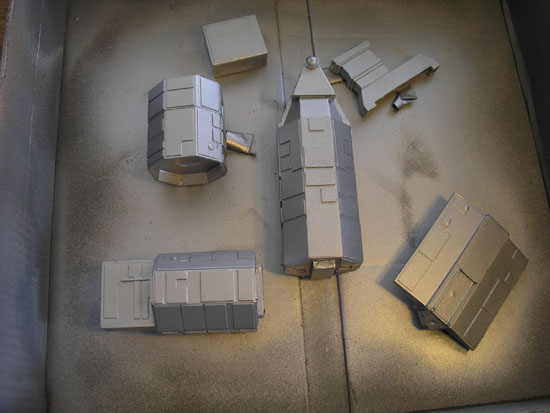
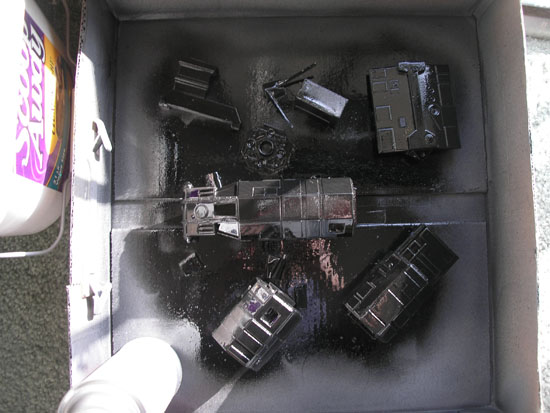
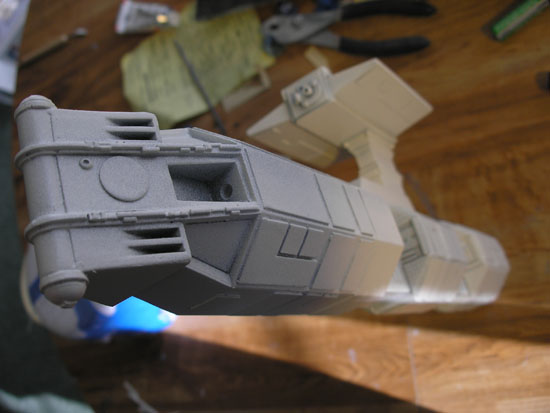
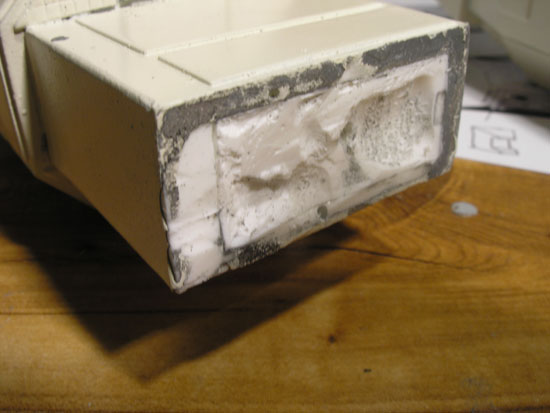
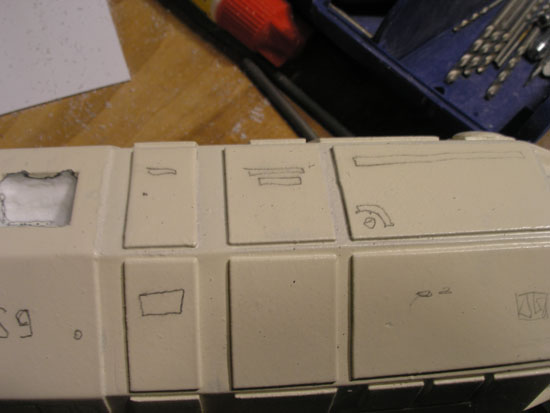
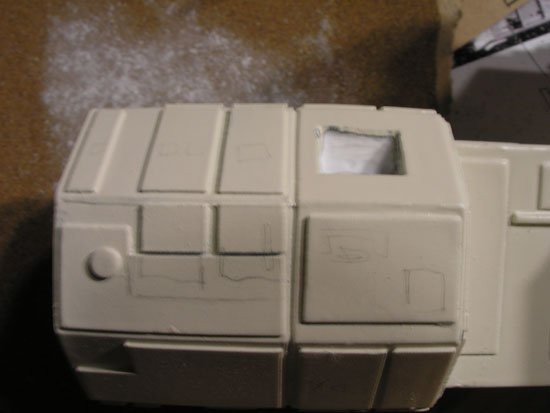
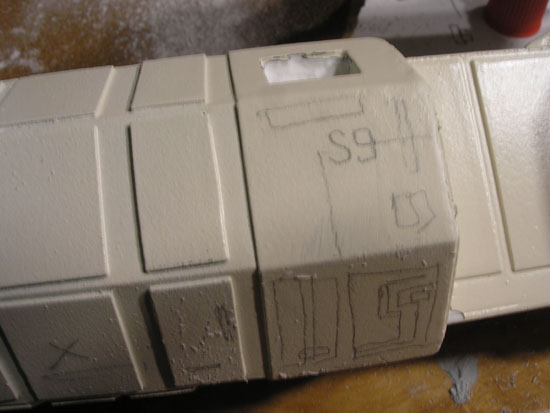
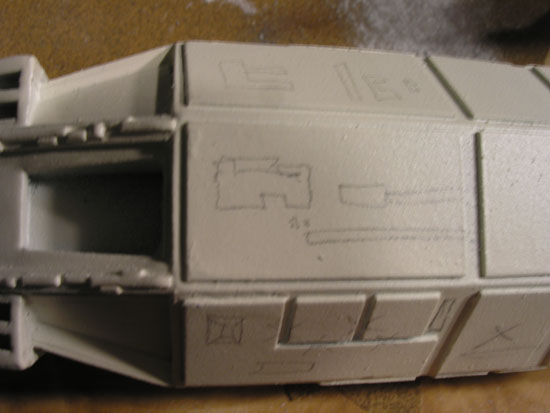
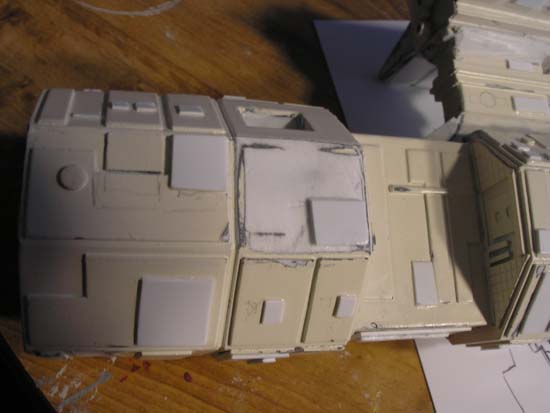
Washed and hand dried. The octagons are hollow and have an air hole at one end each. Water got in all of them, one more so than the others.
Wanna paint!!!
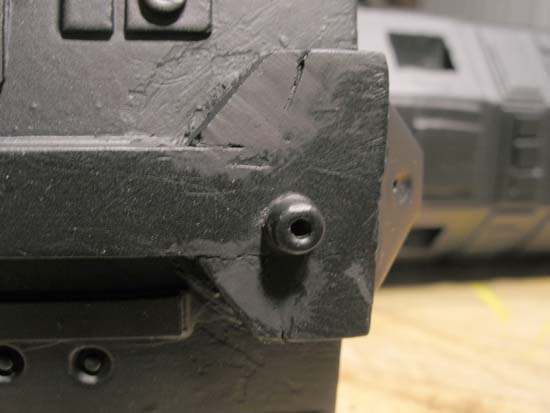
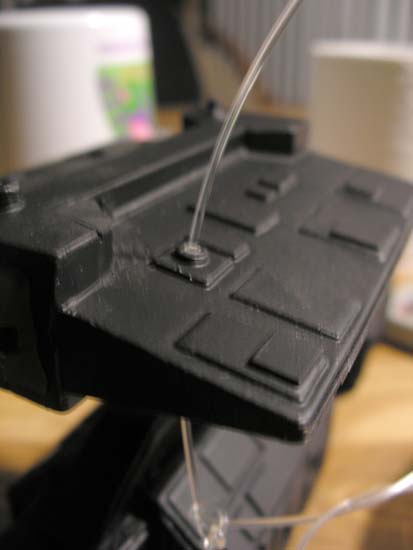
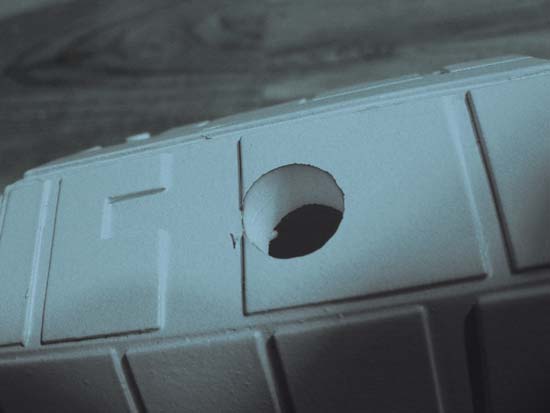
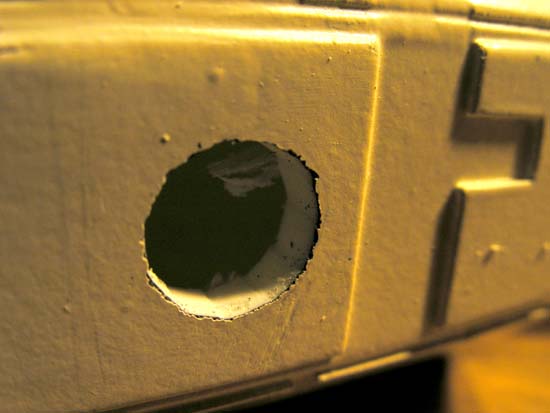
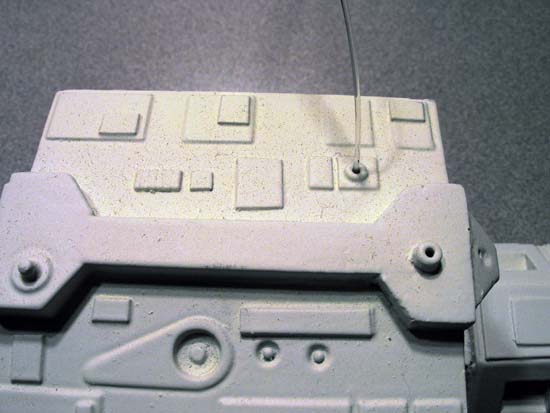
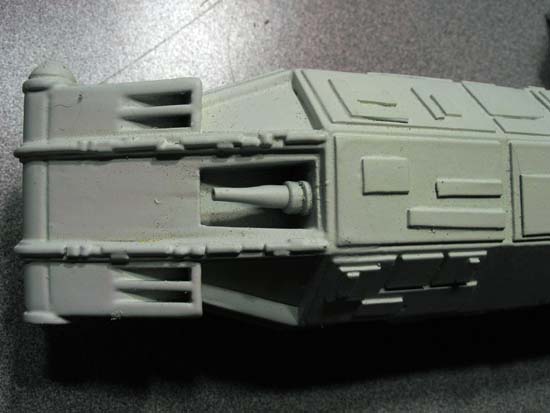
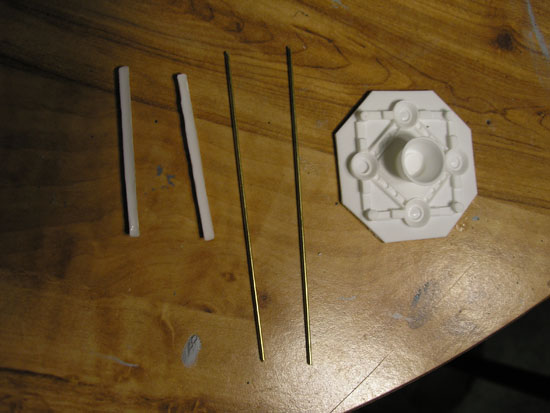
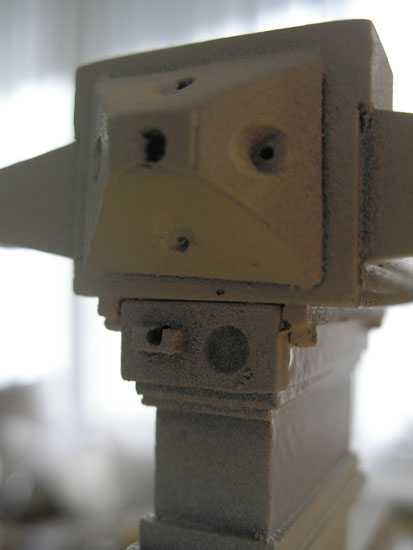
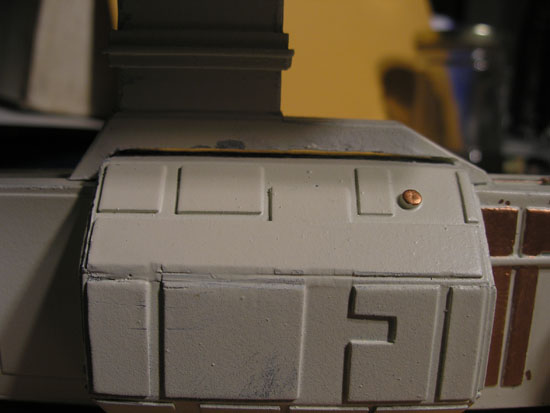
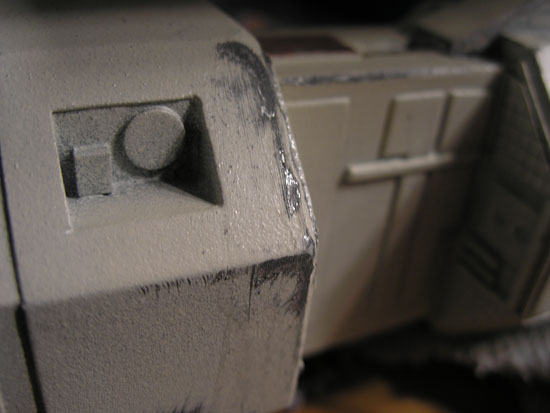
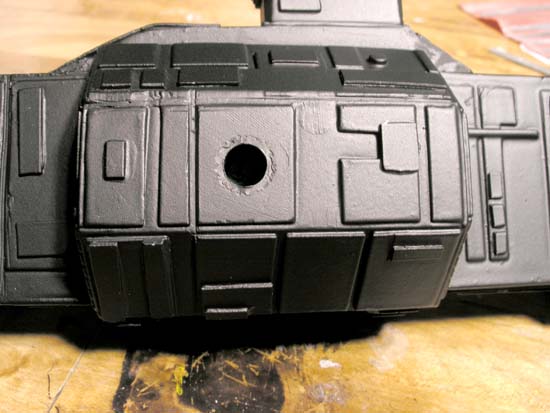
Will need to drill a hole for the aft antenna. The topside antenna sits nicely. Found a couple other bubbles, but they were in bulkhead territory and will not be viisble when completed.
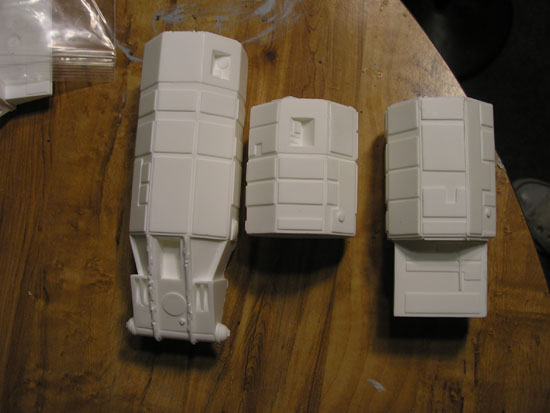
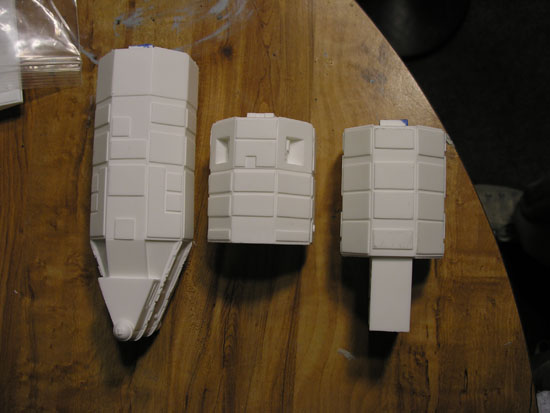
There is a distinct way to assemble the parts. Though a couple of them seem interchangeable, they fit better one way than the other.
These are the only reference I have for the ship.

071118.13
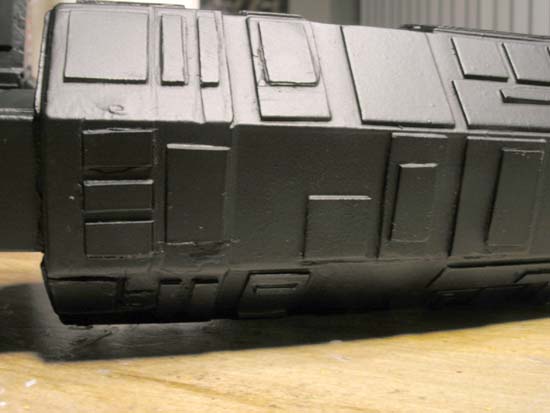
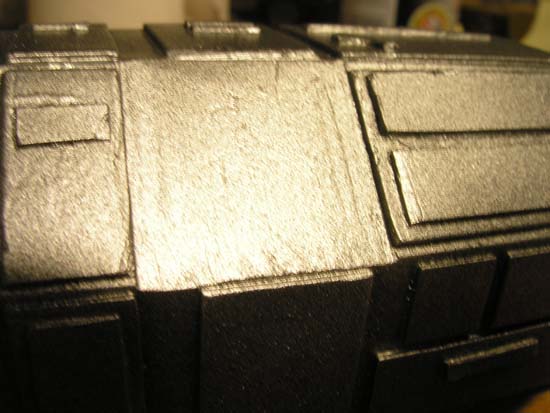
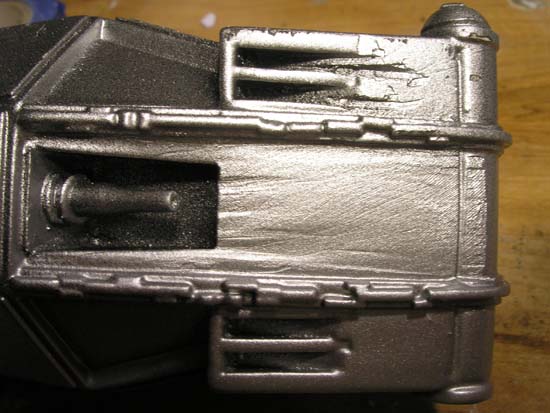
Got a dark gray primer down. Didn't want to risk a first pass with the black I have. With another coat down first, I'm going to black next.
.14
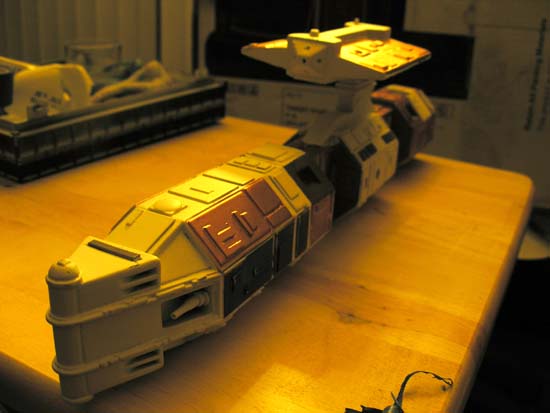
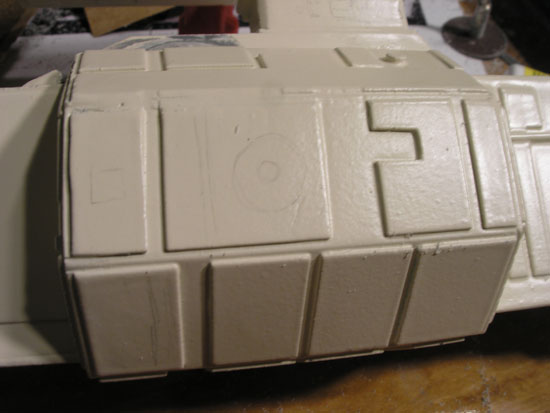
Went to silver. Managed to get ultra light, but quite thorough, passes. At least one more silver pass on all sides. And I go for the base white. I need to first know if I can again find this Heirloom White I am going to test. I only have 1/3 can left and it is primarily for a particular project.
.16
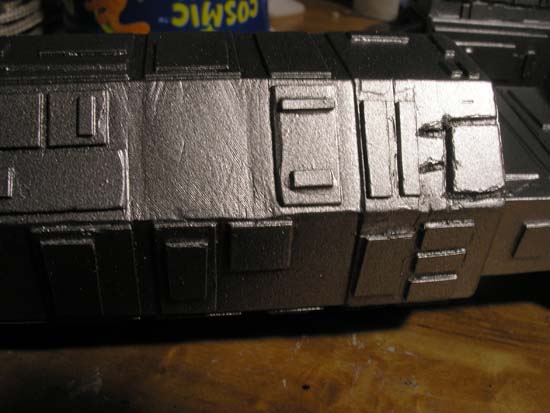
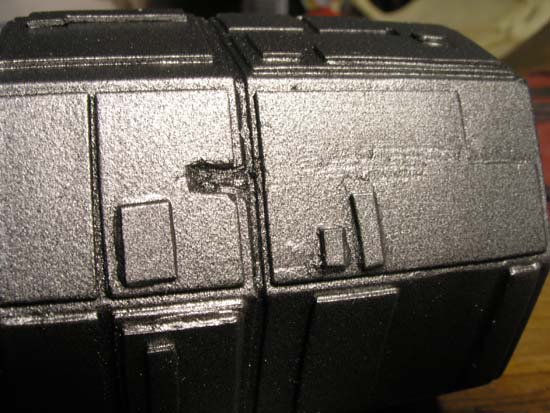
Had just enough black for one full pass. I am now doing a silver dusting layer, just enough to give the panels some brightness. The nooks are still dark. Just need to flip the pieces over in a half hour and can get this done before sundown.
I am sure that the Heirloom White I have is going to be perfect. It's just creamy enough not to be white, but not in the tans either. I will have to experiment with the spot colors. It looks like I can add a lot of surface detail too.
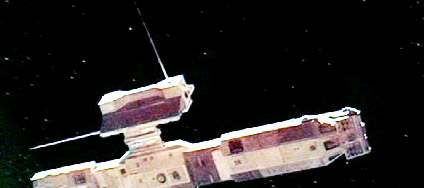
Here's another reference:
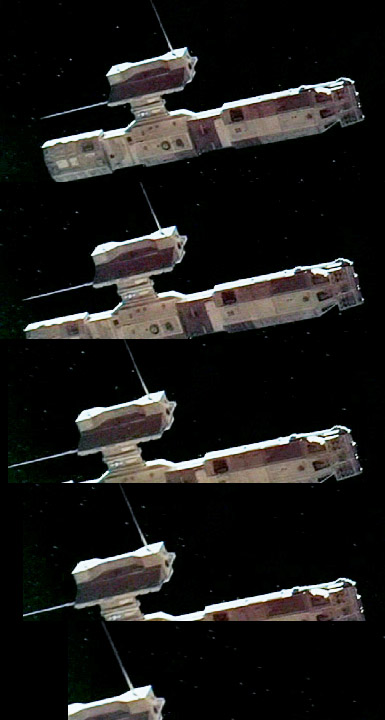
That's it... Full Rez.
.18
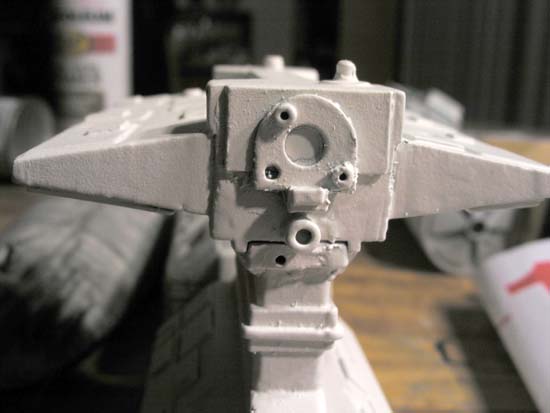
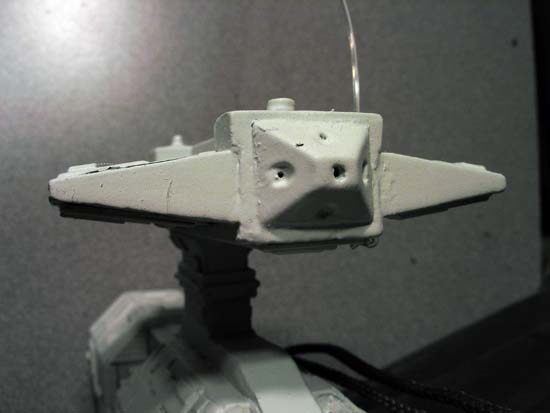
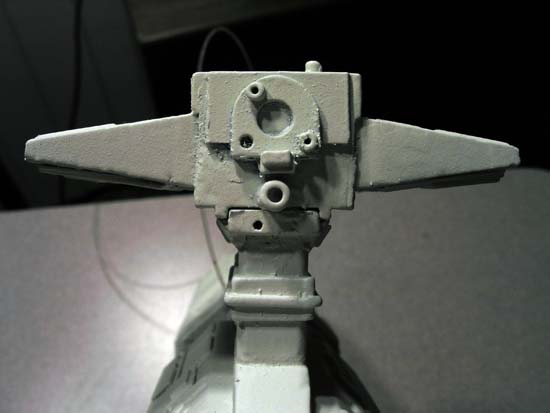
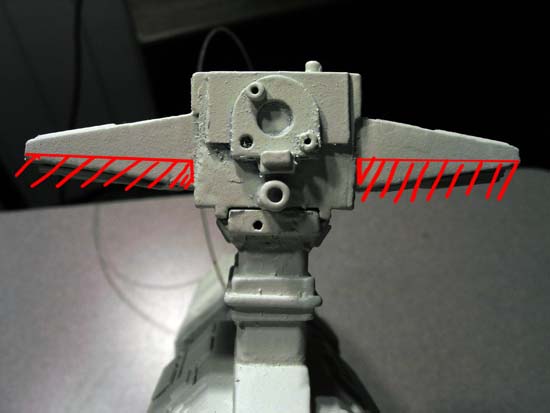
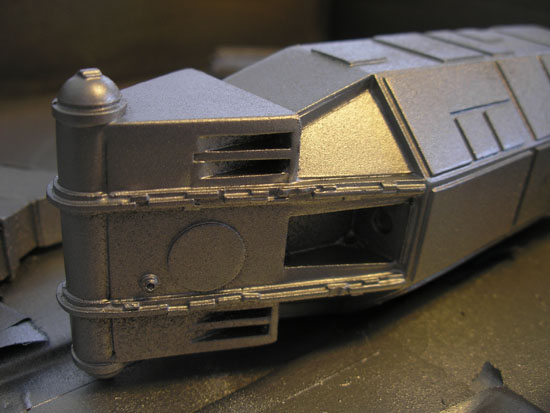
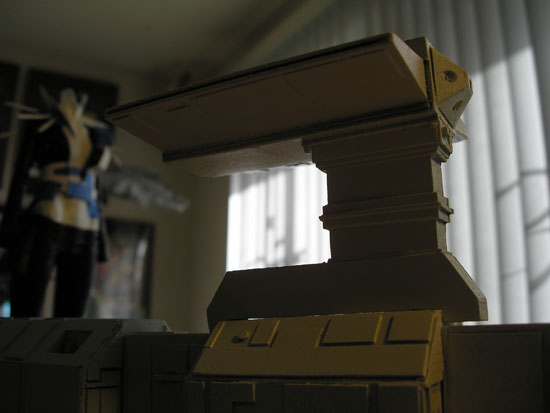
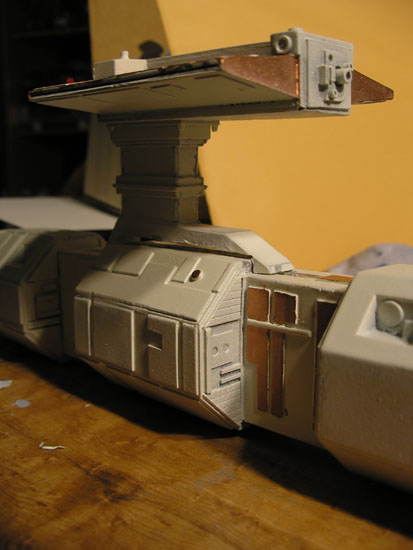
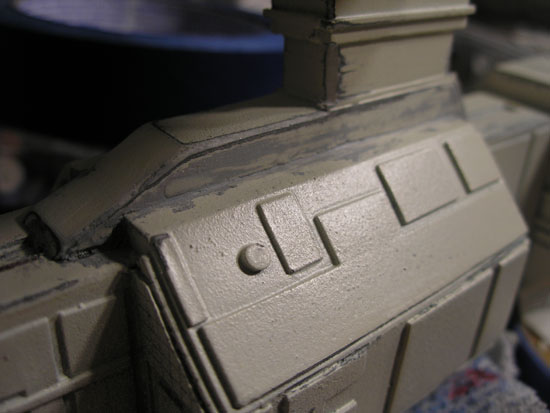
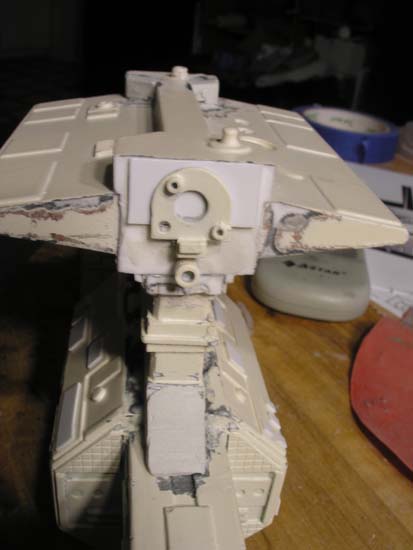
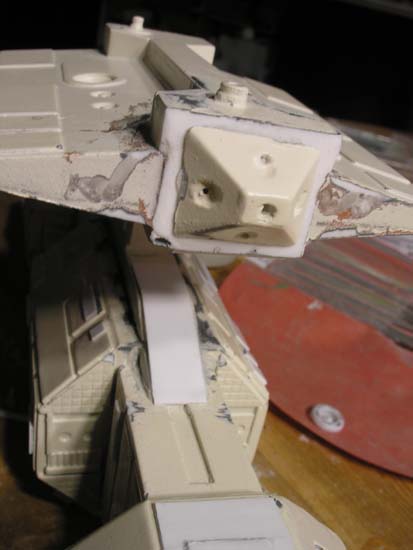
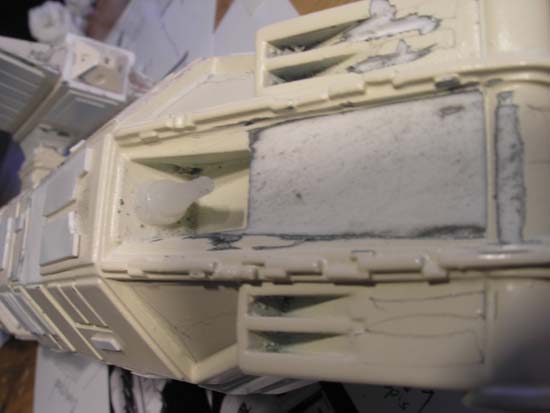
There are a few features that I will need to modify. The conning tower base has a larger angle on the model and the tower itself is block square. It looks very rounded in the reference.
I don't think that top is maroon anymore, rather likely the same rust color that the stripe down the right length is.
.22
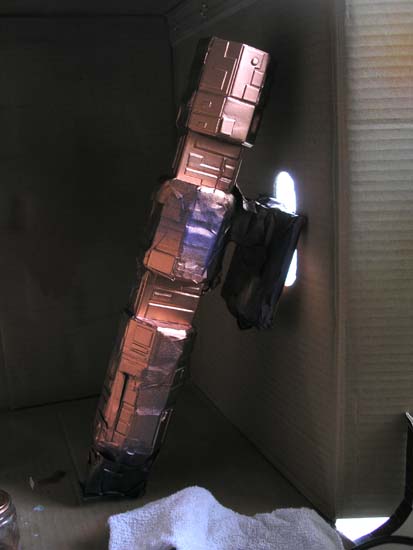
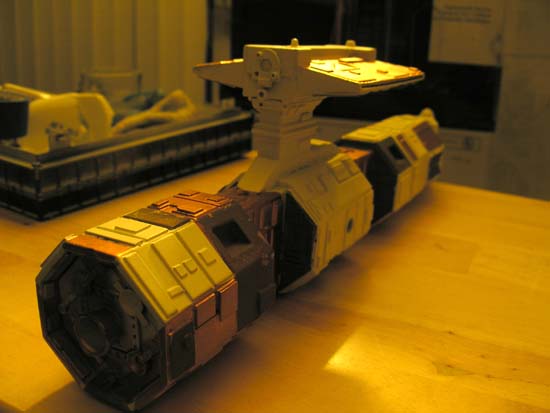
The silver is down and the ship is curing. Tomorrow, I will give one piece a test with the Heirloom White. If good, I have to get more anyway, so I will simply get a few cans while I'm at it. I also need to stock up on basic black and white primer. I polished off four cans of paint today, three on this guy alone.
071119.05
Put down a nice test spray of the Heirloom on one side of all the pieces. Came out good. Going to wait until later this morning to flip them over and do the rest.
That could be it for the base white! I can glue it all together this evening! All other painting is spot colors. I think I'll be able to fake a lot of it. Sharpie may even work best in some cases!
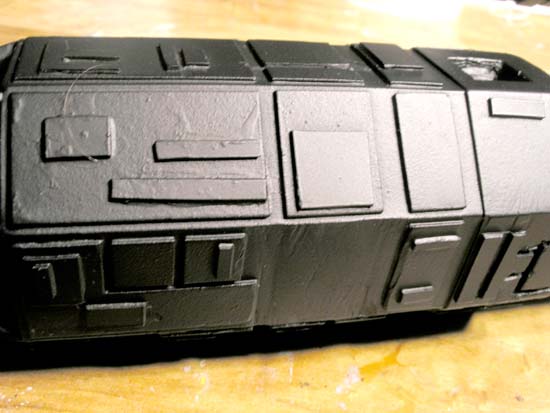
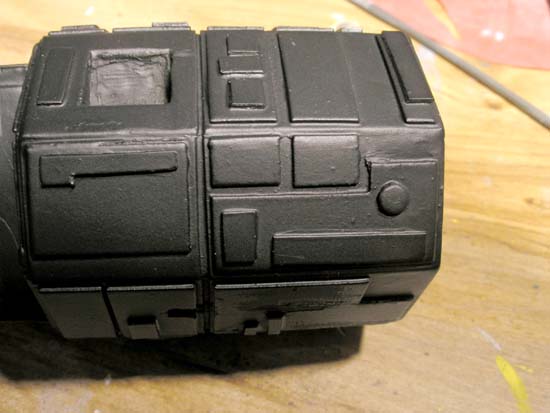
Apart from the airburshing, this kit is essentially finished.
.14
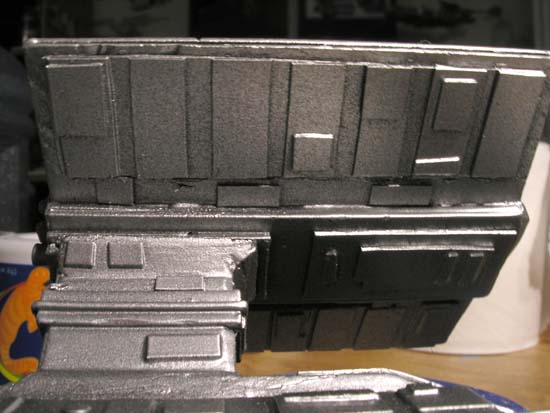
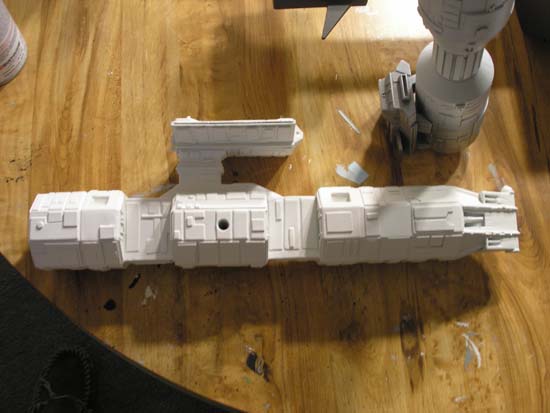
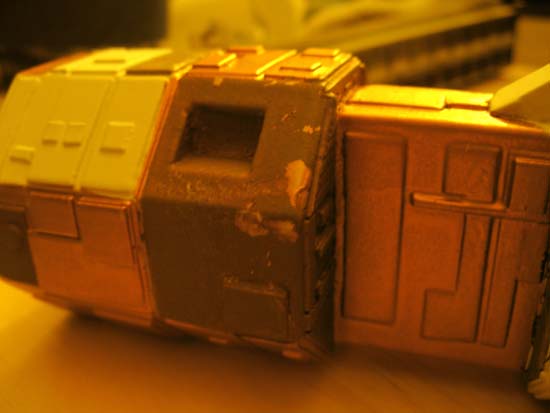
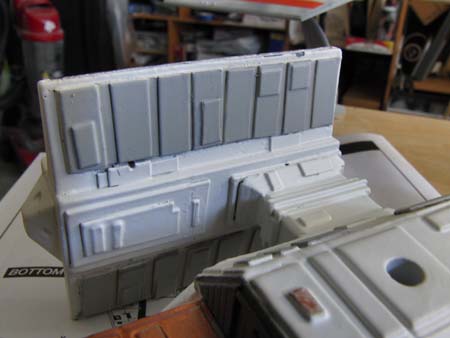
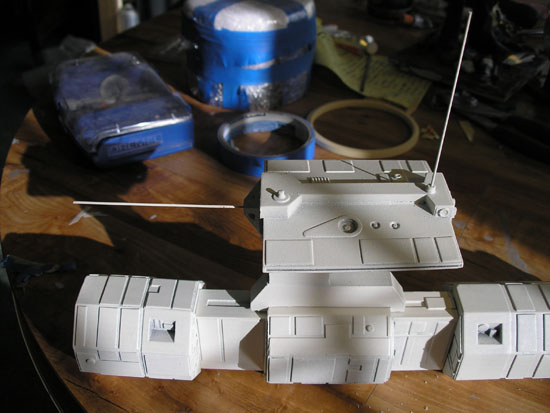
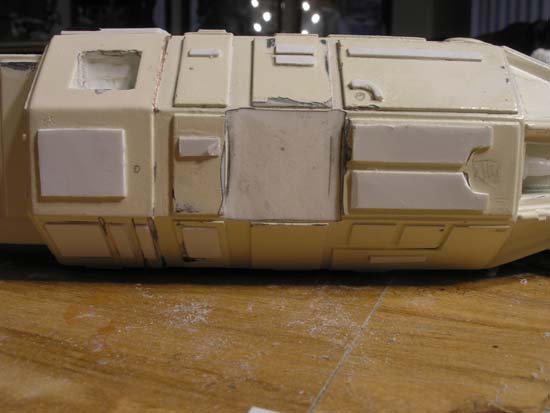
All white is down.
.16
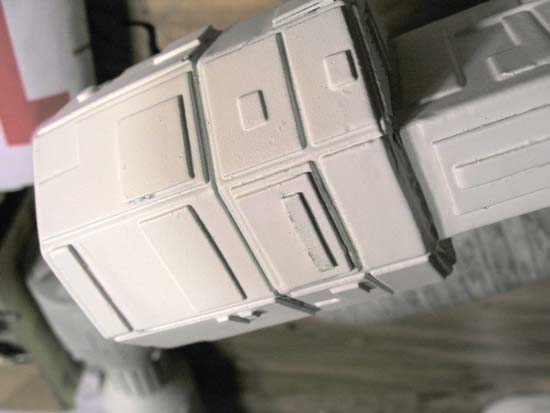
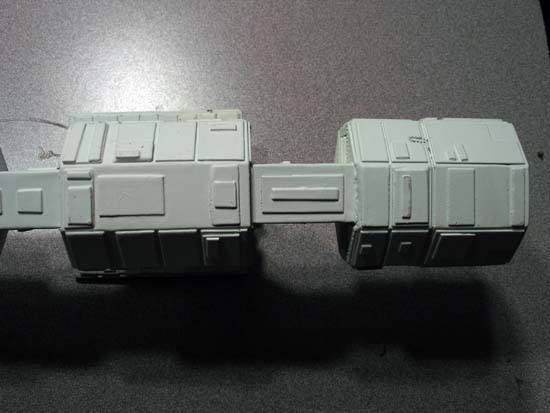
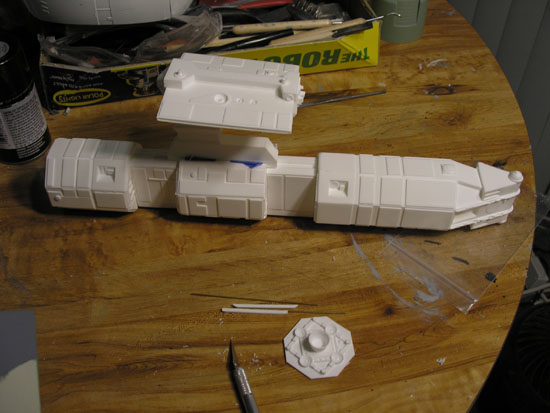
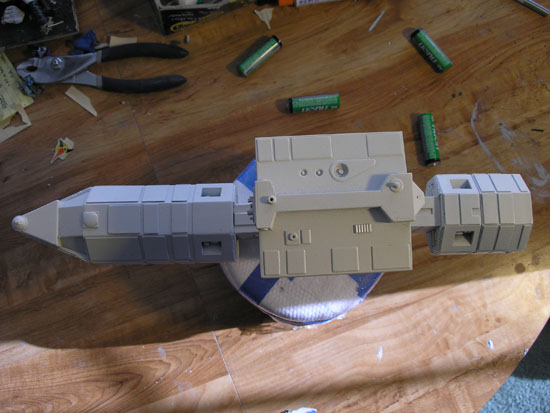
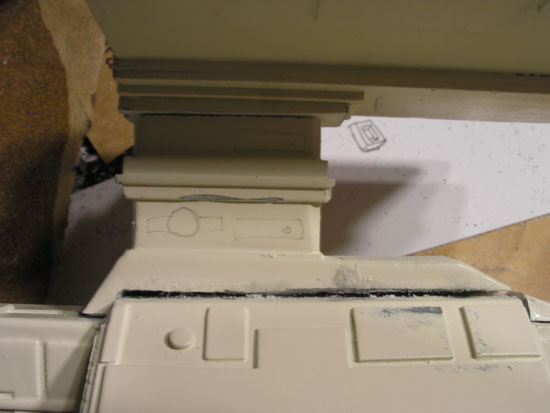
Body is glued together. Conning tower is glued to Comm Suite.
I am thinking of rounding the tower edges away. There seems to be a slight twist down the length of the model as though the master was torqued mildly somehow. A wood center beam would do it.
.17
The body gave a slight creak as I applied force at the ends. I dabbed more glue at those points where it seemed weakest.
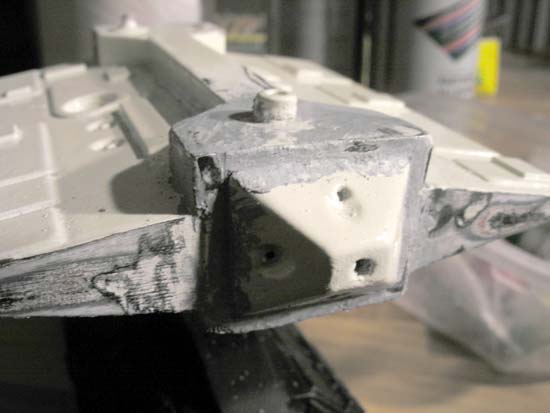
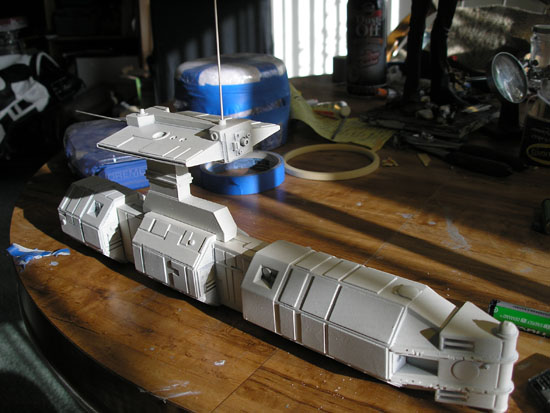
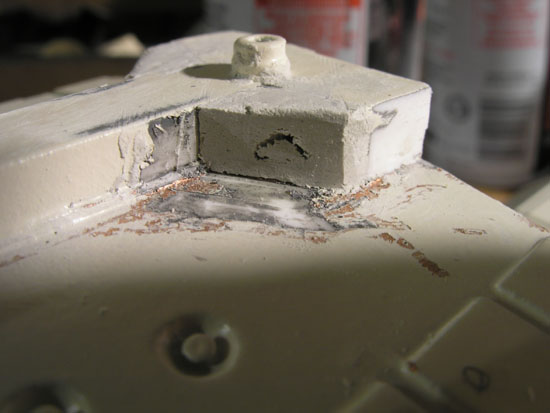
I will be reshaping the tower base to be better inline with the miniature.
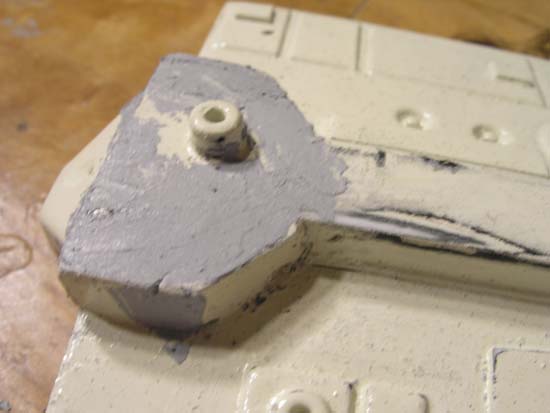
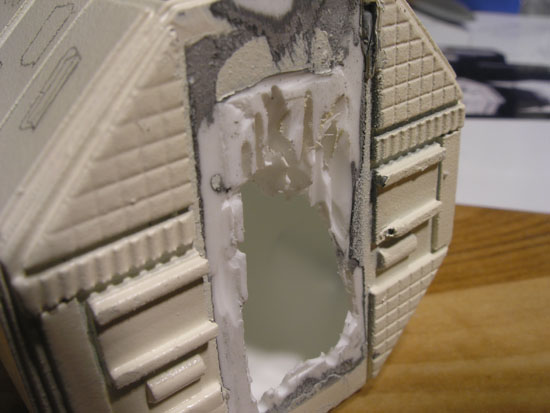
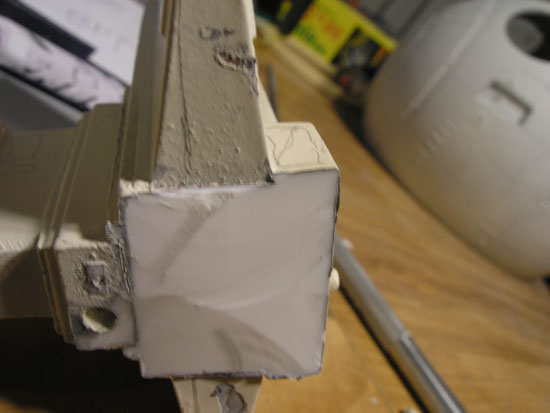
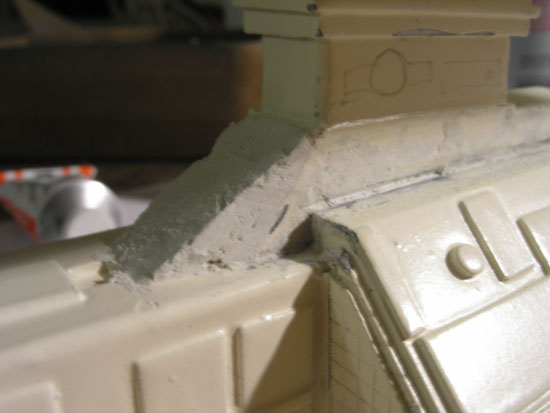
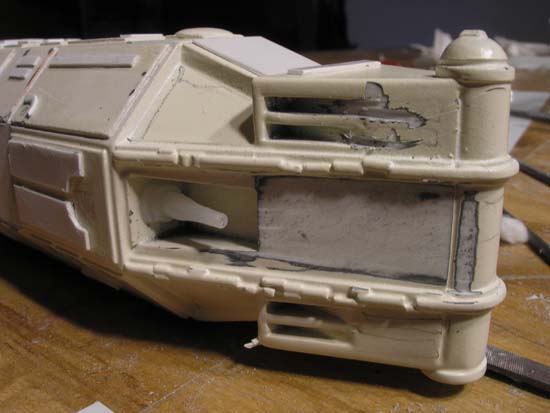
.23
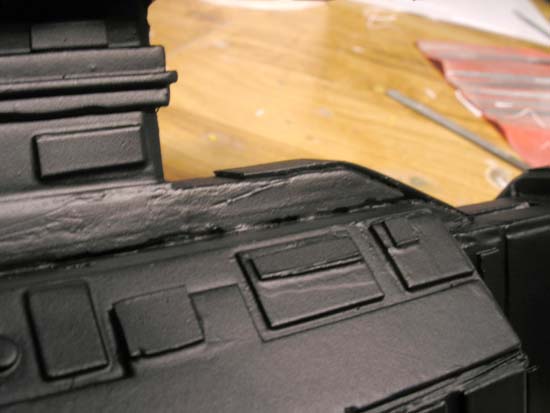
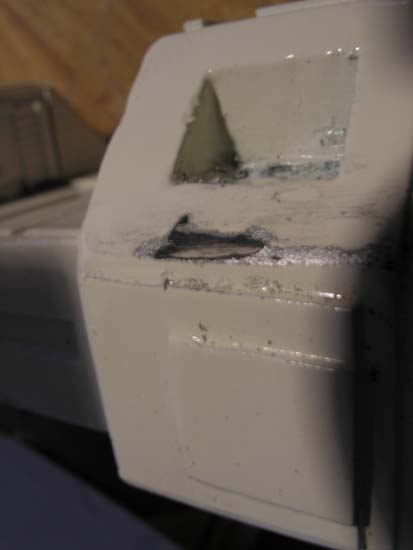
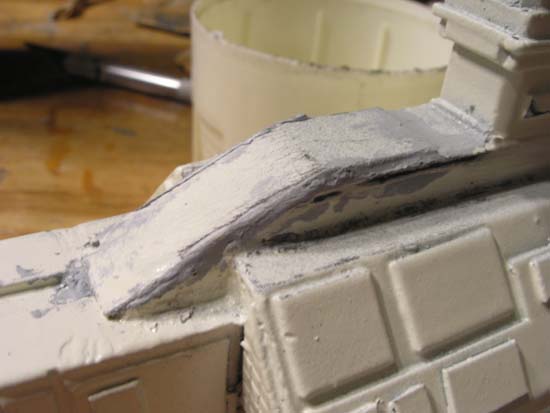
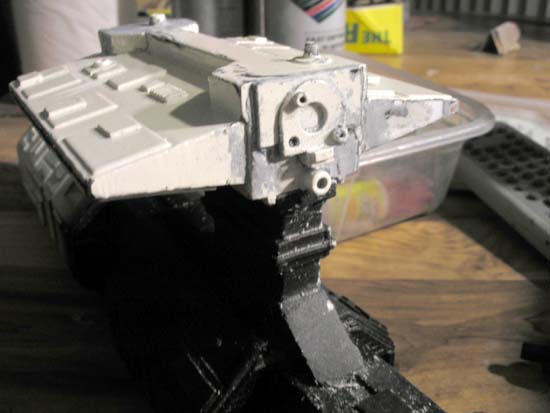
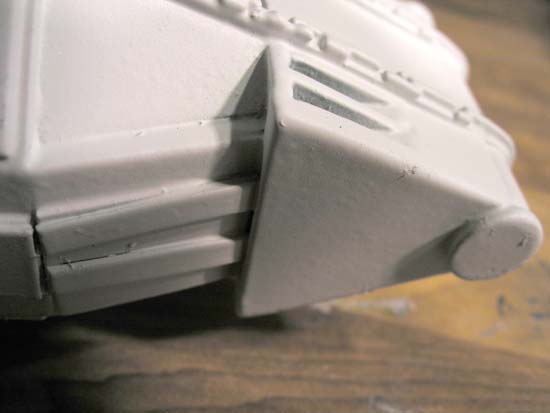
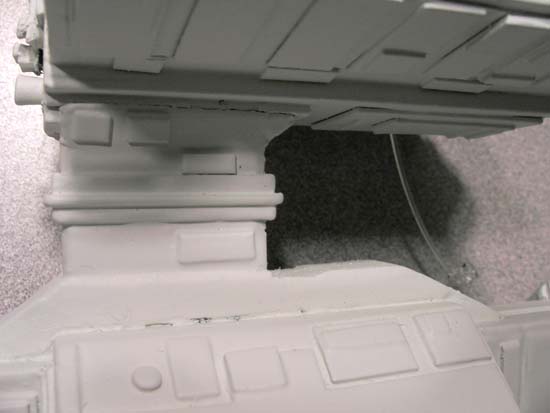
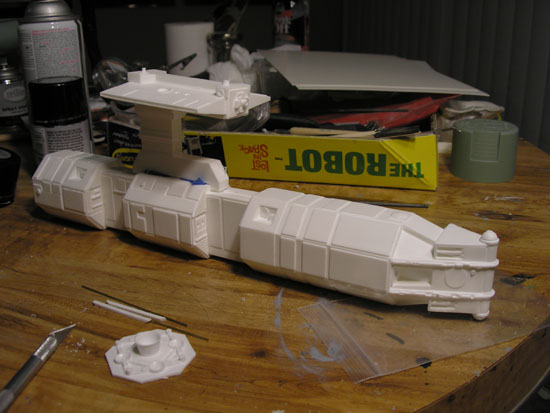
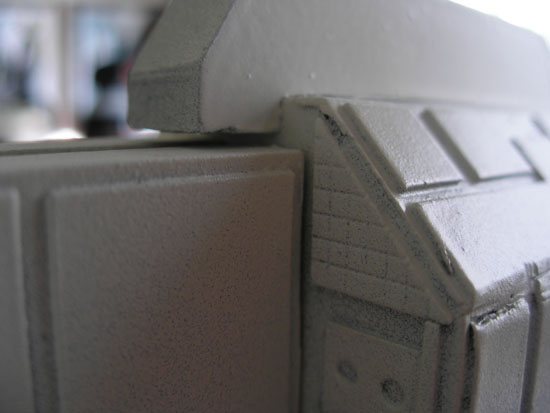
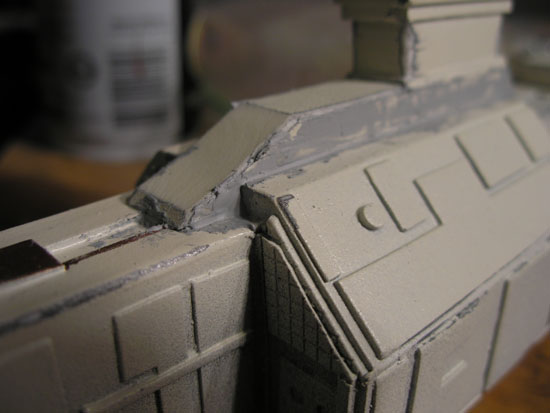
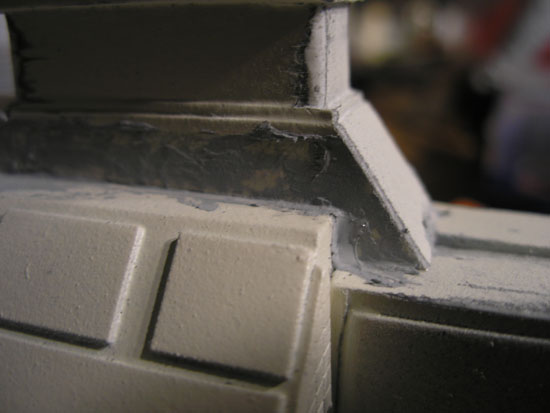
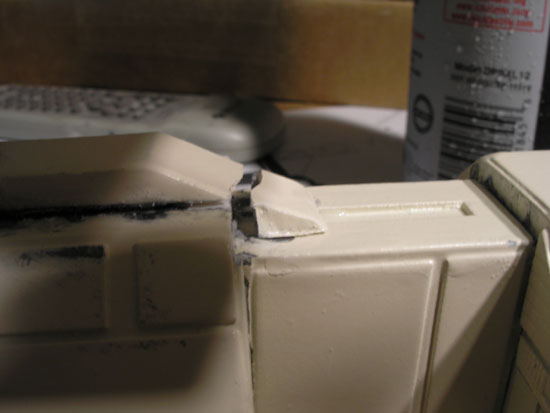
Dremel sliced the underside away by half. It needs to go more to be accurate, but the way it is designed, that is as far as it goes without damaging the structure. Also, angled the forward side better. Itw as steep and ugly before. It's a little more graceful now.
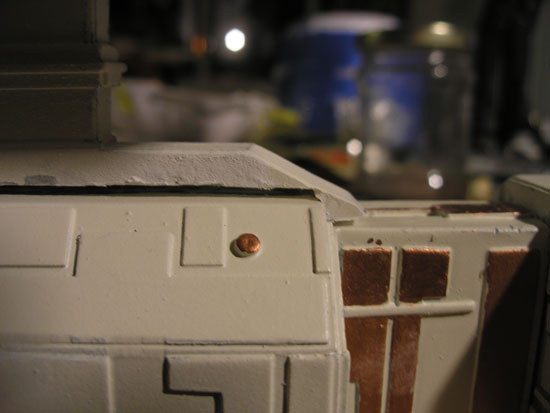
I finished off by gluing the tower to the body. Afterwards, I filed away at blemishes and resin lines that the paint revealed. I think I've got them all. It now looks like a beat up space ship ala' star wars.
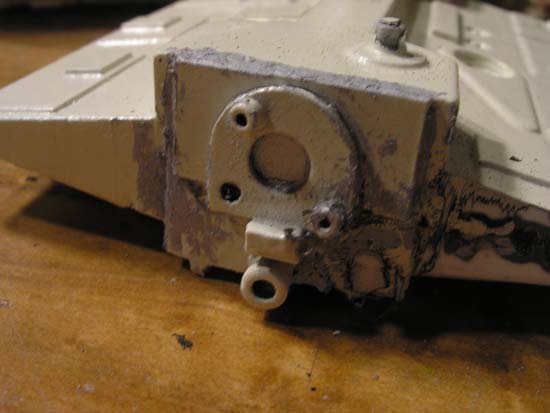
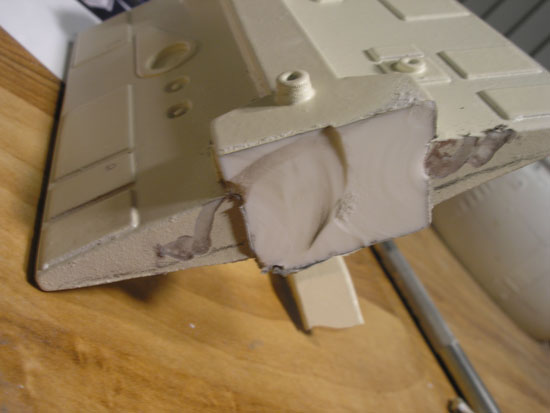
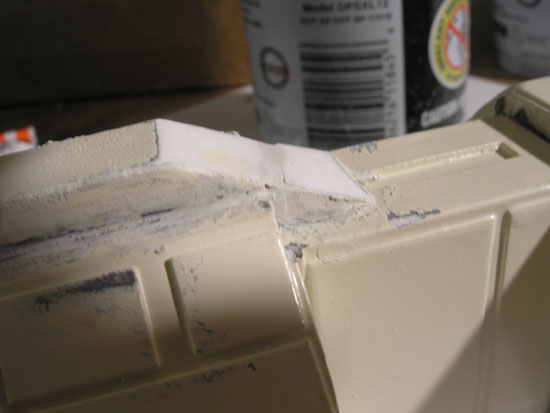
071121.03
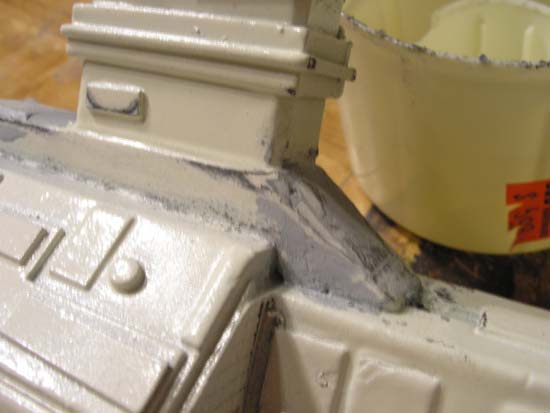
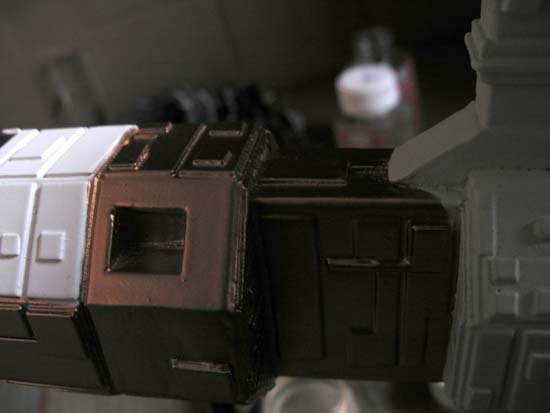
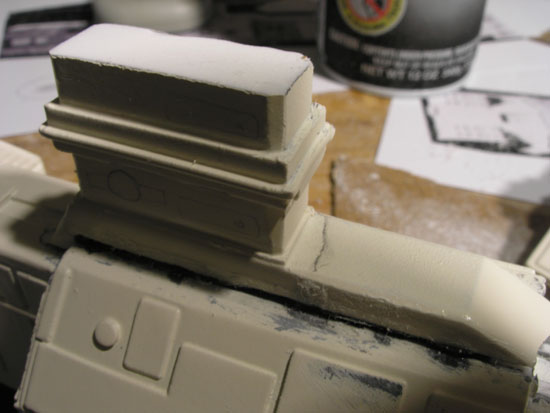
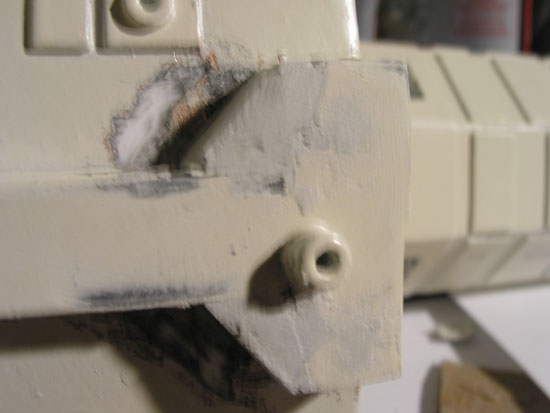
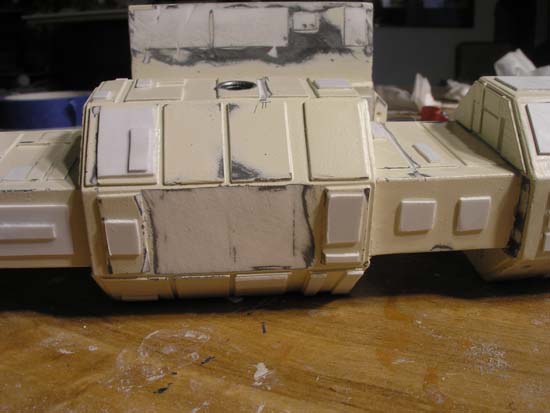
Snaped the tower off the body. The base is still too much. I am going to have to cut it way down and rebuild it entirely. Looking at pix and the model side by side indicate some significant differences between the two. Much of it can be solved by cutting some styrene panels to cover what is already there. Other things like the tower base will need reconstructive surgery.
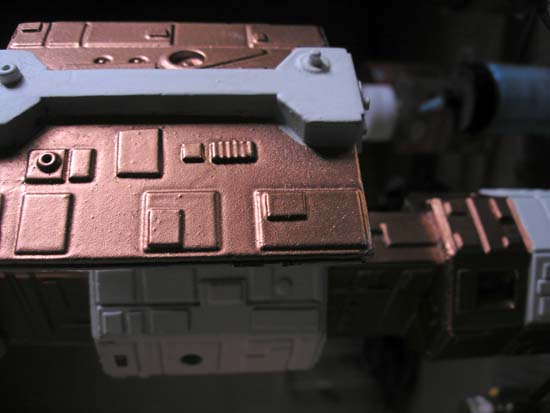
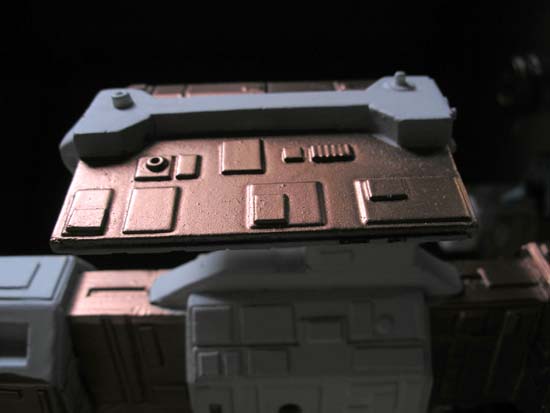
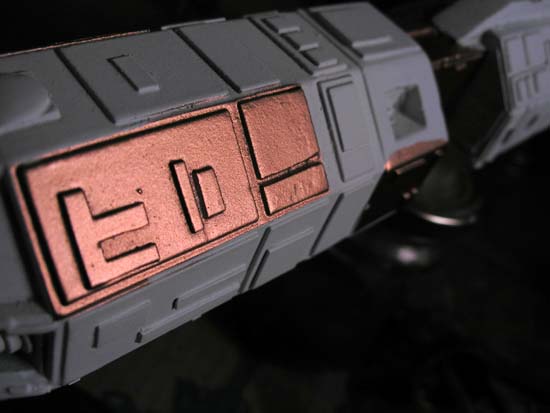
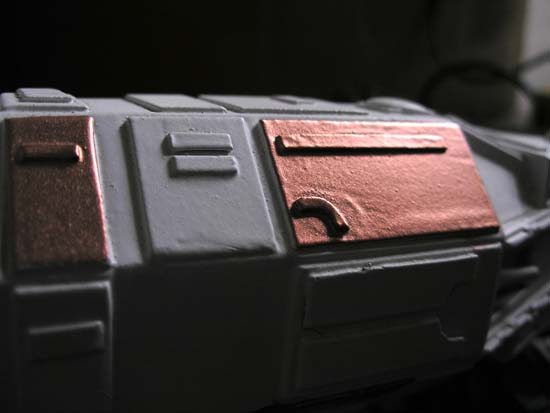
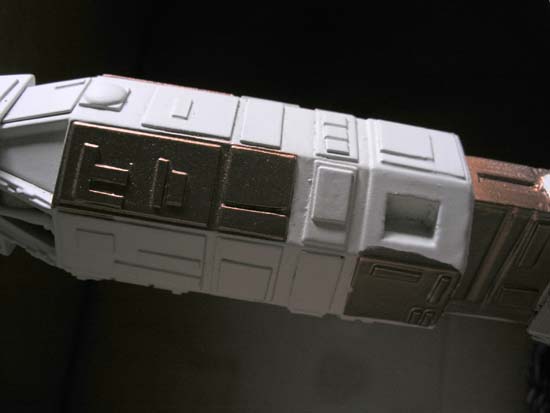
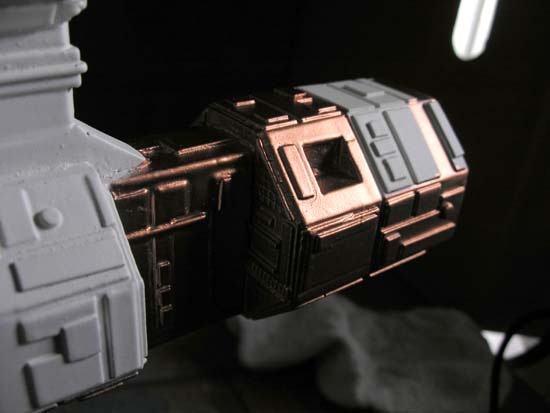
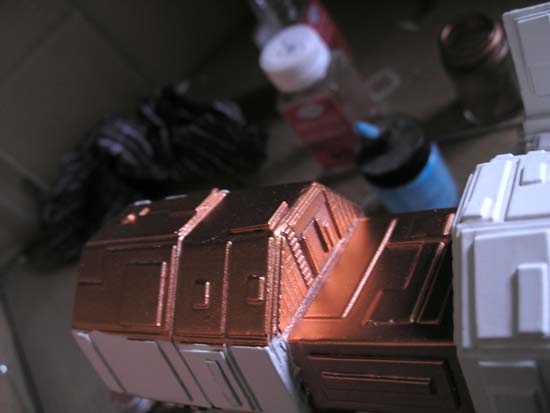
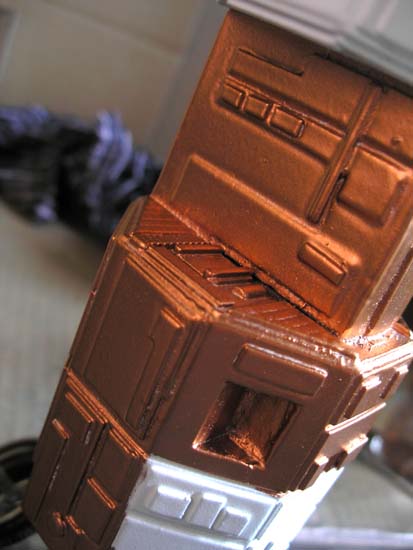
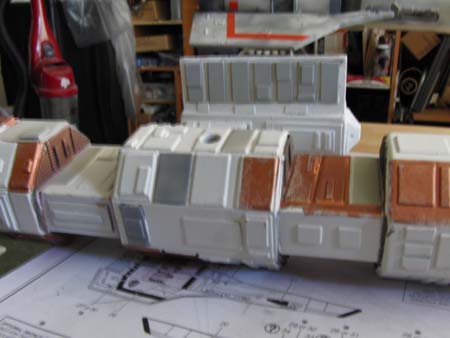
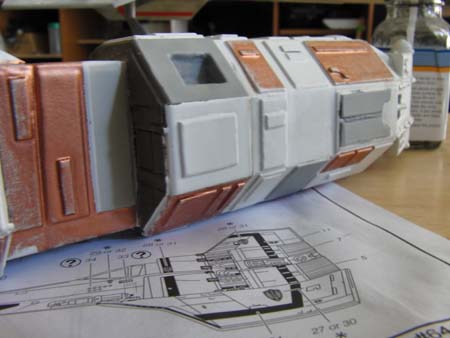
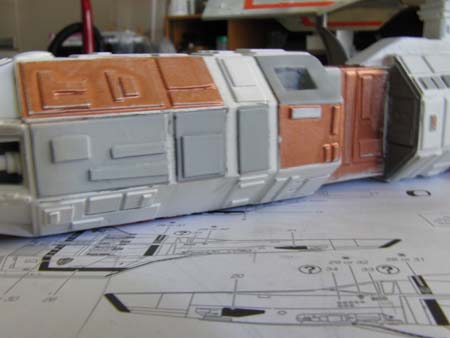
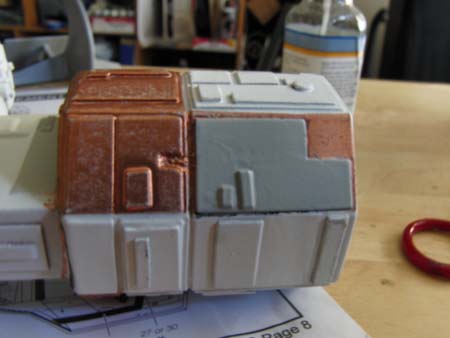
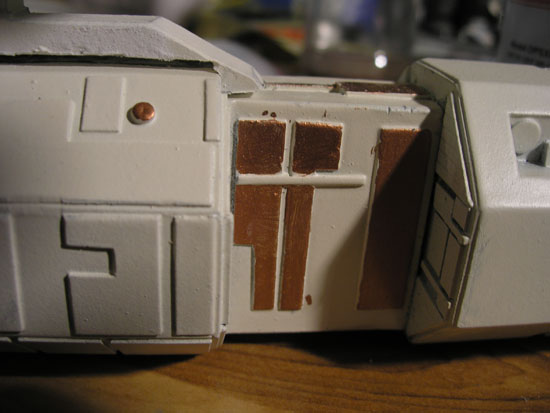
Did some test painting this evening. Tried mixing copper with red, creamy yellow, and sienna. The results were that I went with plain copper on the model. It looks okay. But further imaging indicates the the color needed is actually a maroon of some sort.
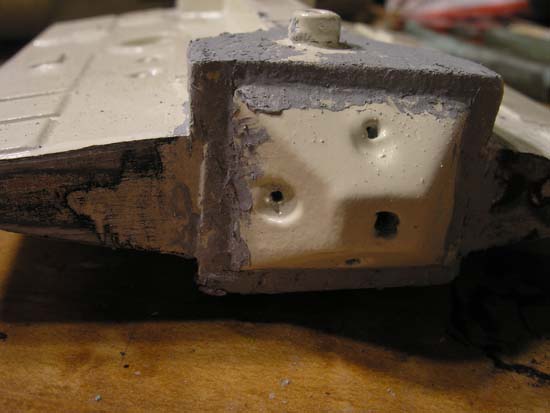
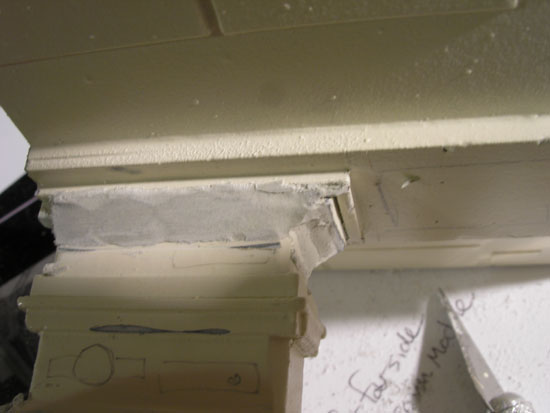
071124.18
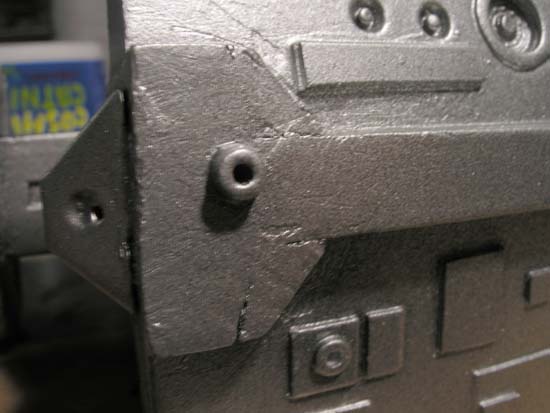
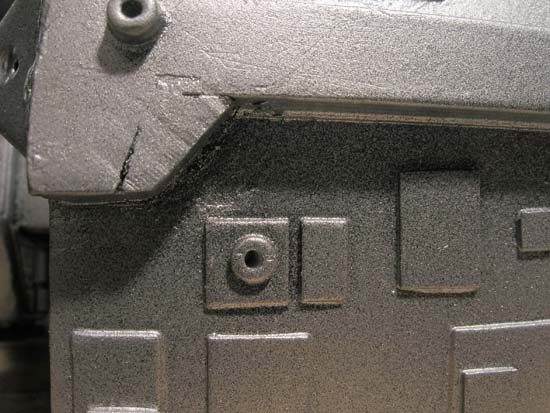
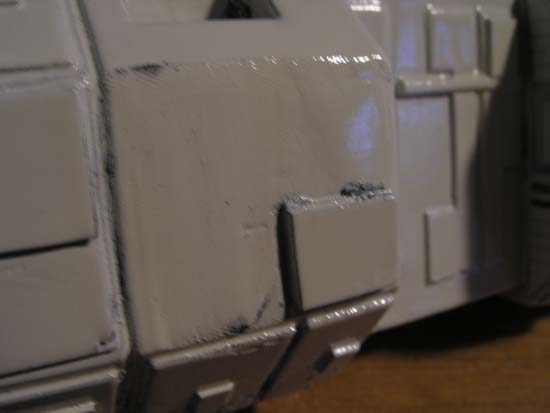
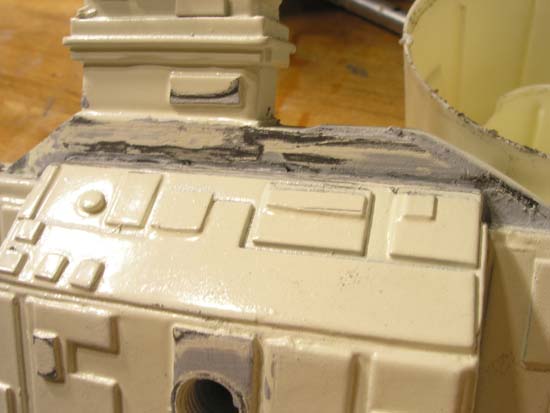
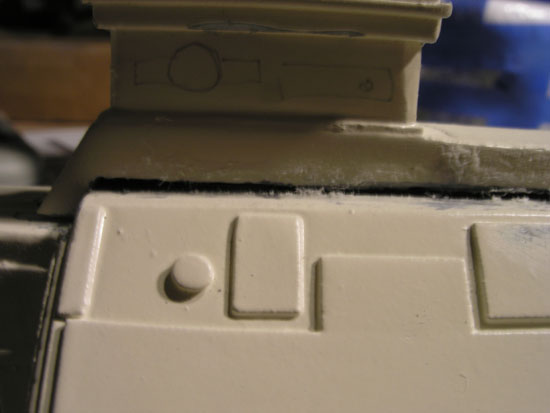
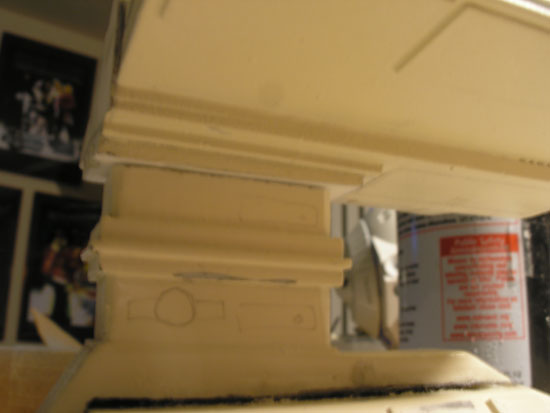
Over the last few days I have tried mostly been filing away at paint blemishes. The other major feat was the reshaping of the tower base. I cut it down to what I thought looked good, thought about it for a day, cut it more, thought more. Last night I got it down to where it should be. There is an angle going down the z axis, but it's good.
Couldn't find any more Heirloom White, but found Rustoleum's Shell White. Put some down an hour ago and it looks nice. Very soft, pale white. Will have a better look in a few hours once it is dry. WIll finish painting the body tomorrow. It's too cold outside now to do anymore tonight.
071203.21
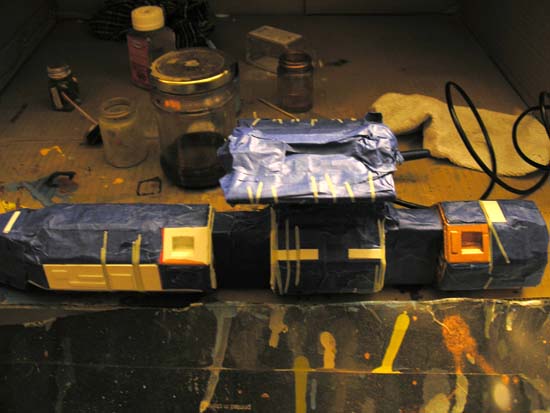
Over the past days, I have done some major surgery, which has also invovled my breaking the pieces apart.
Read my WiP at for more details:
http://www.2001-3d-archive.info/forums/viewtopic.php?t=19
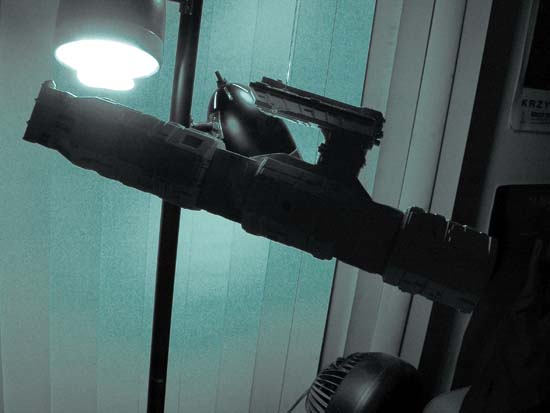
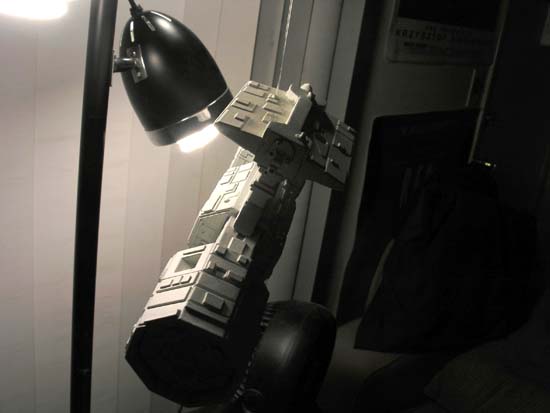
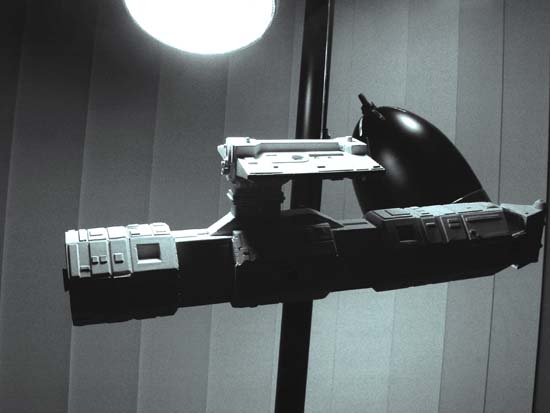
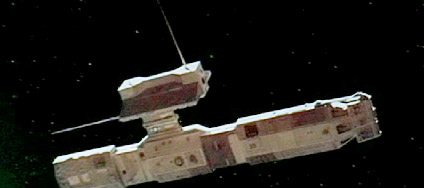
SInce a pic is worth a thousand words, here's another 30 and I'll shut up now.
080103.22
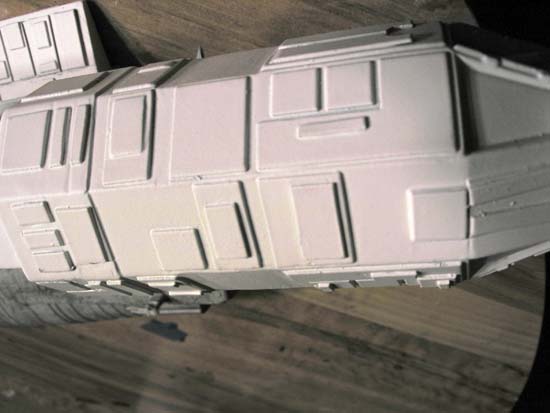
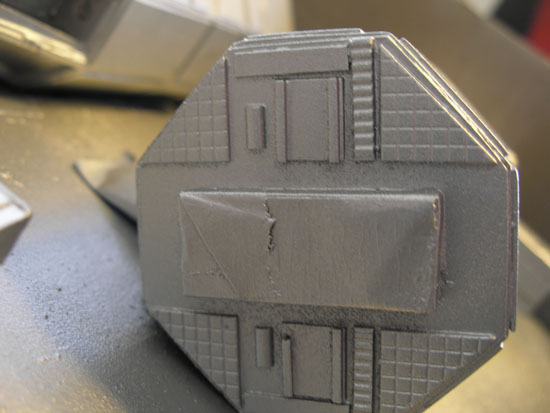
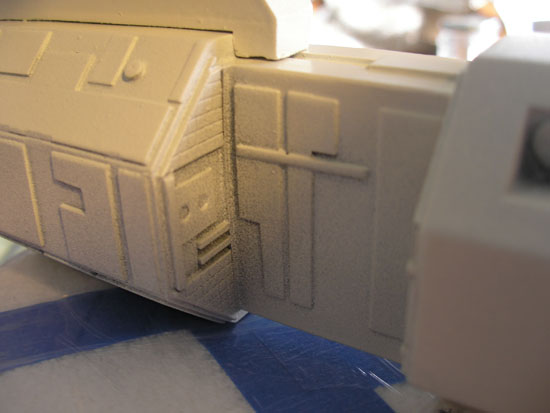
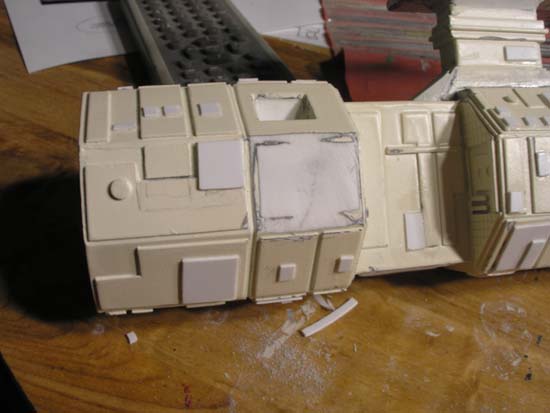
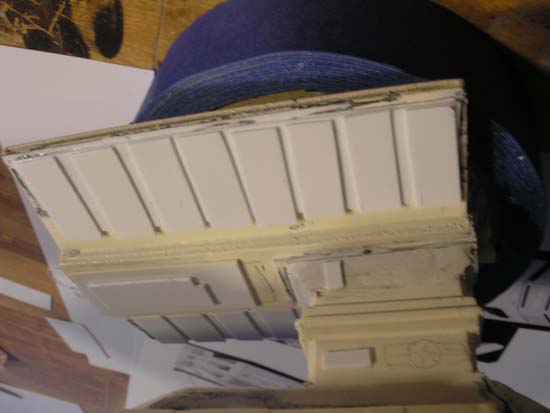
I broke this one out and had a fresh look at it. I've got another styrene sheet handy to cut all the new paneling that is needed. The trick is how to cut it square. The scissors won’t do it.
080104.23
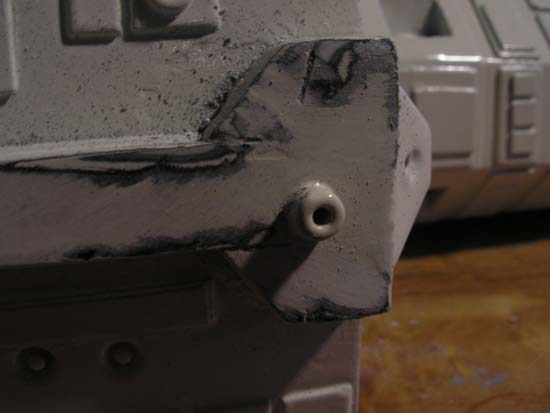
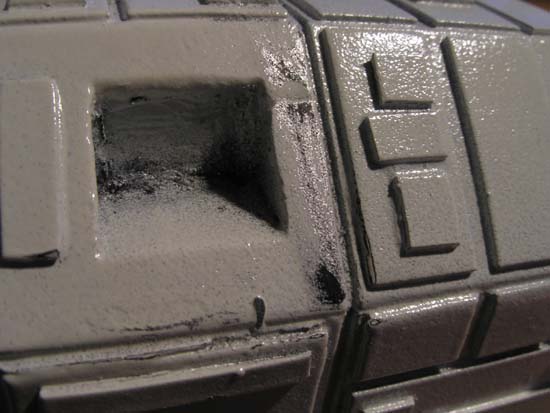
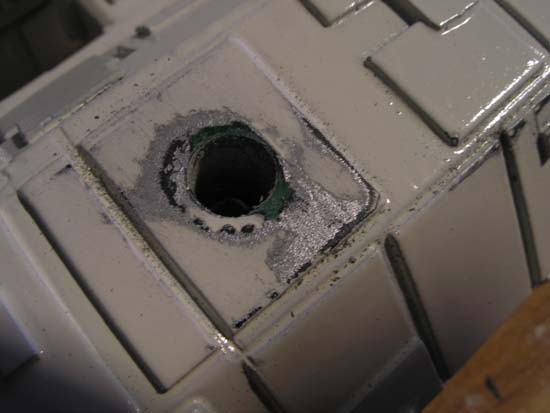
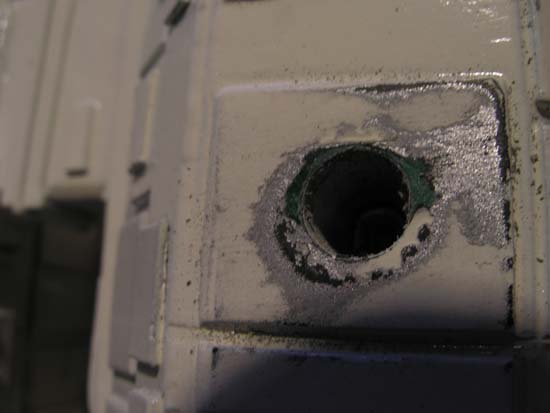
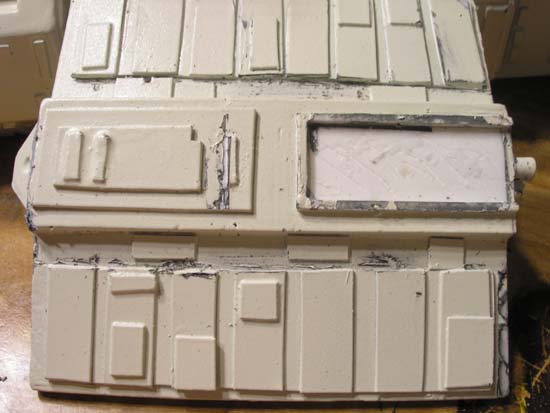
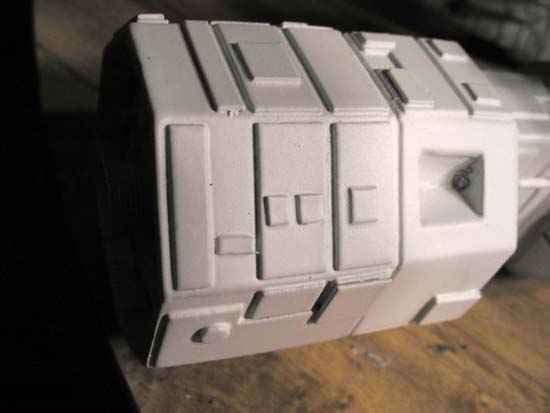
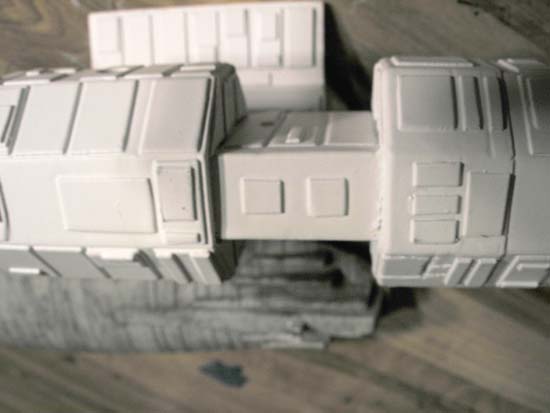
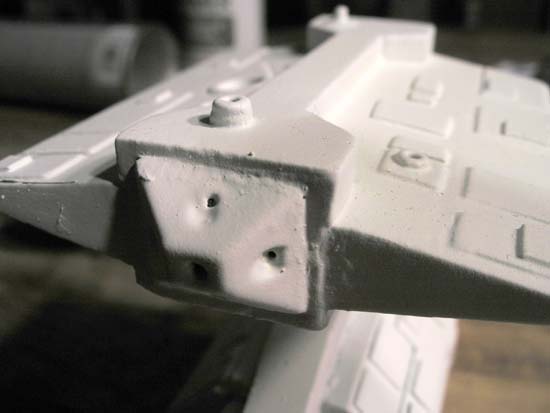
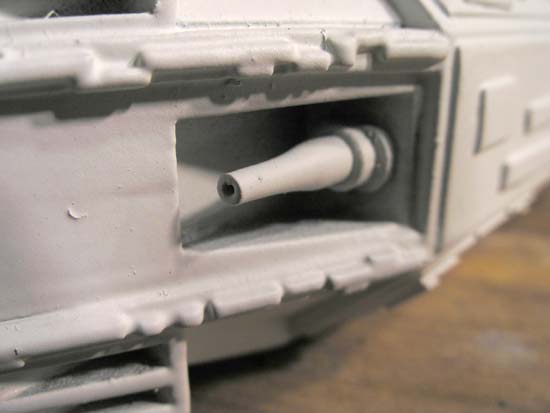
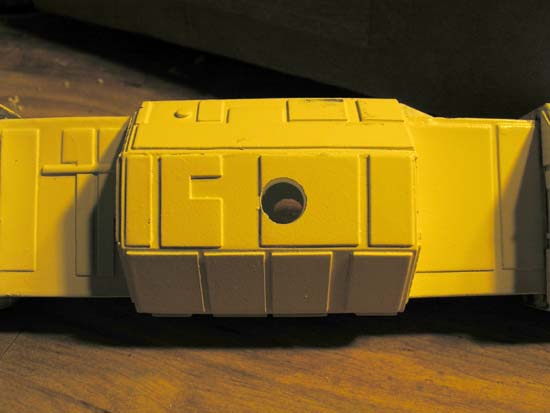
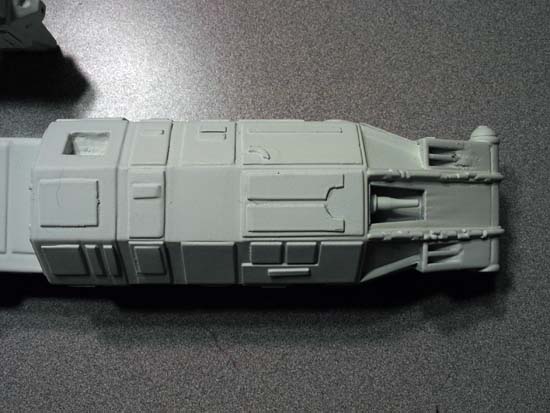
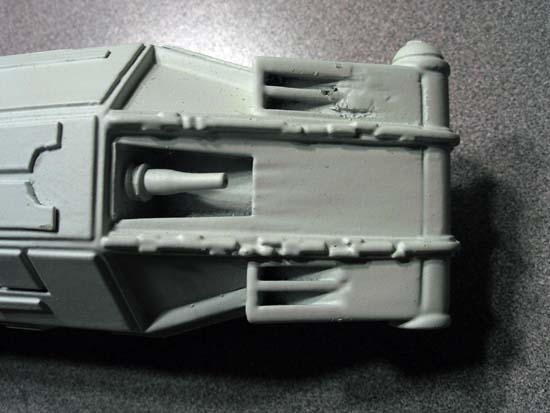
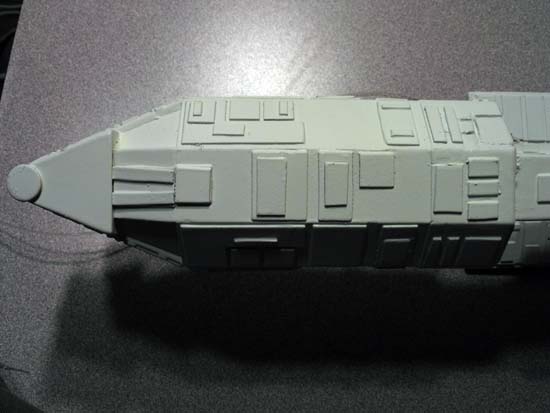
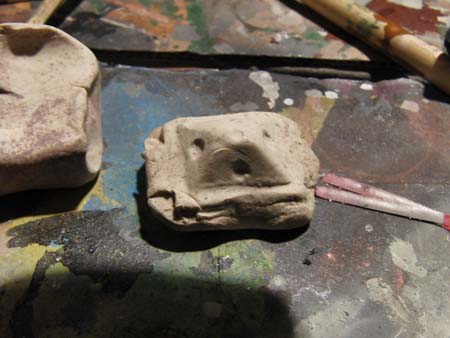
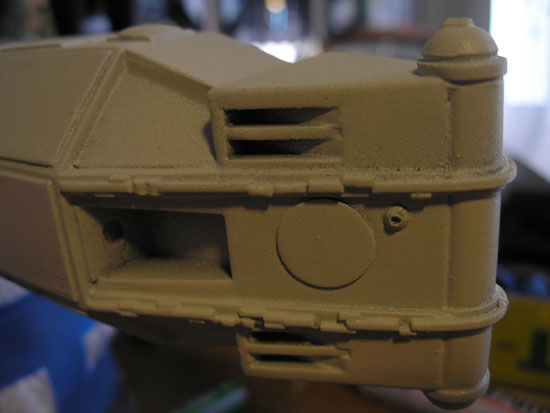
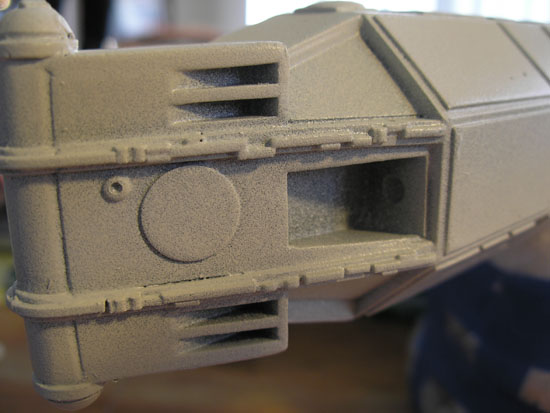
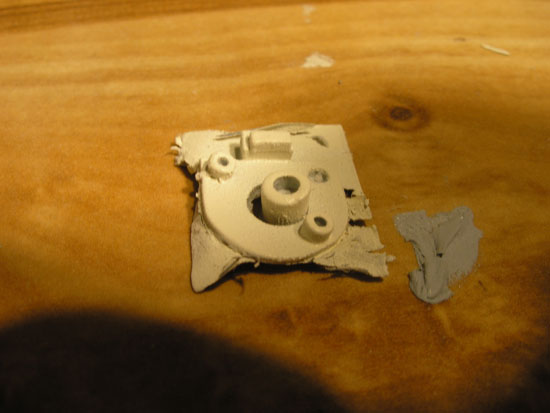
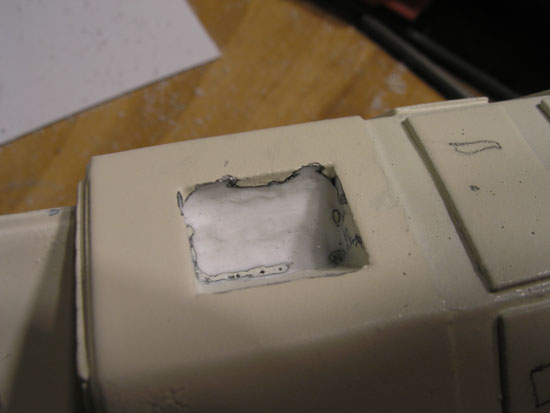
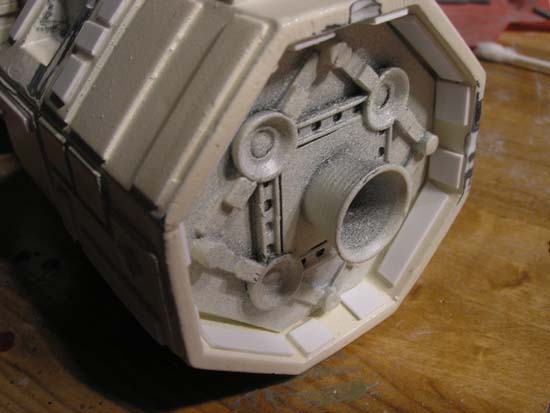
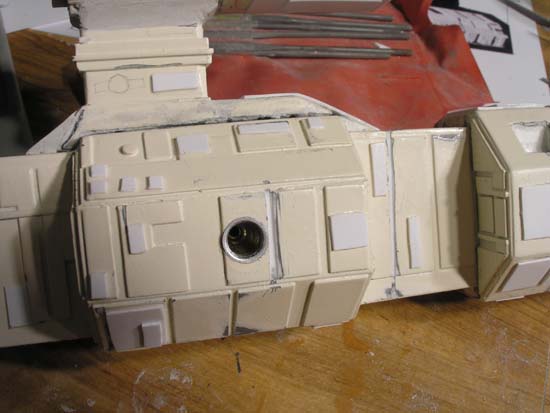
I started this round work by gluing the tback on the body. I cut and placed a CA Gel cap Into the port side misile chute. It fit nicely. I then glued the putty caps I created onto the top of the fore tower RCS and the aft tower base.
The RCS slice was glued to the front of the tower bridge. I had the idea of creating a dupe for the rear, from which it was sliced, however I just took the nobbly bit I slice from the front and glued that on the rear with a bit of styrene sheet to help it out. Finally, the engine panel was glued into the back. The only things not on are the two antennae.
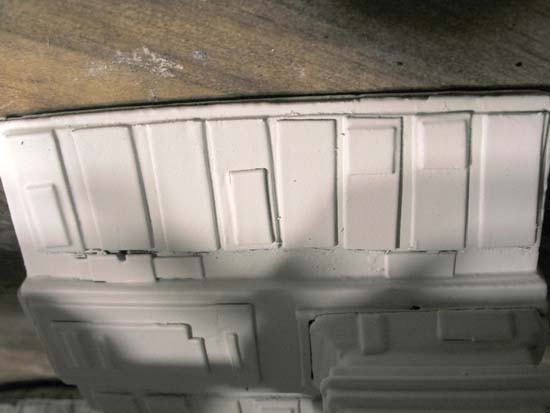
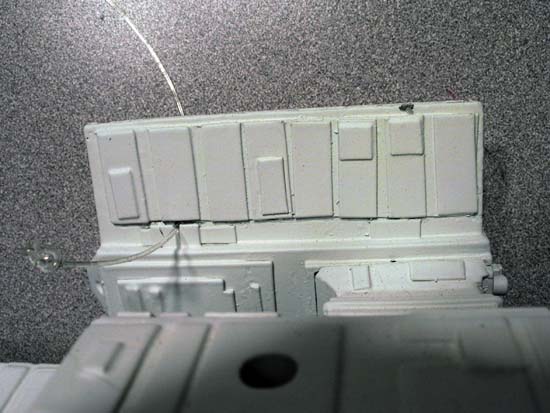
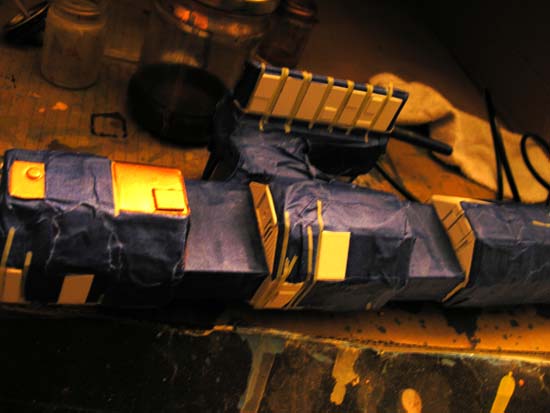
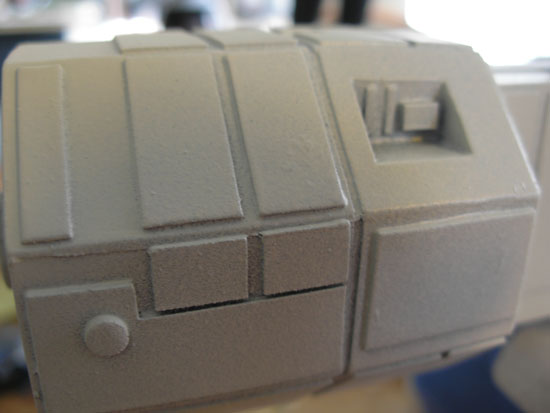
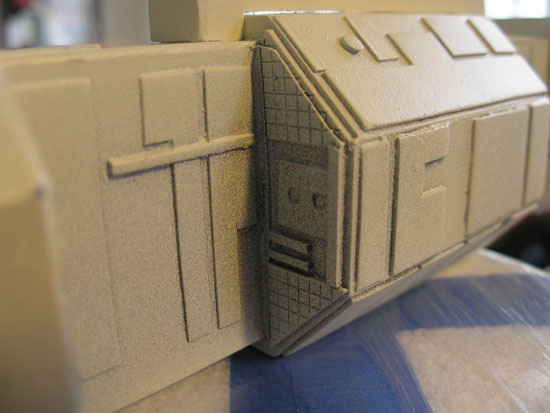
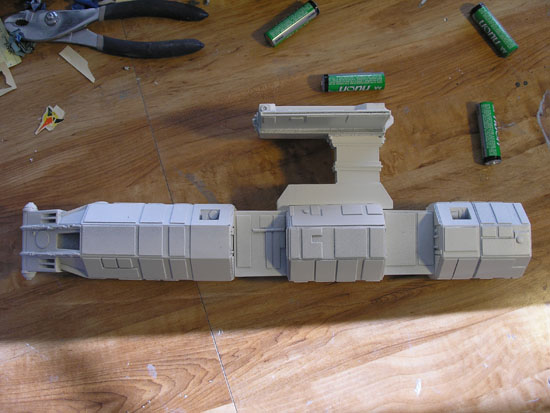
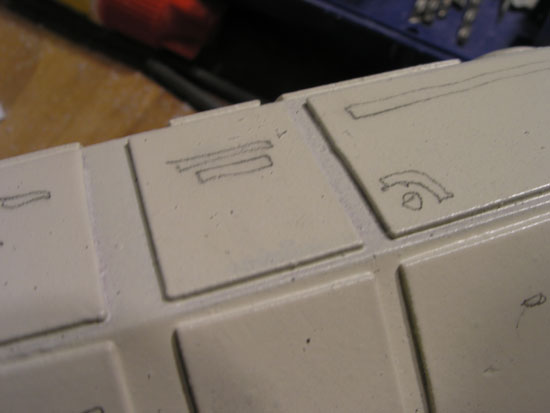
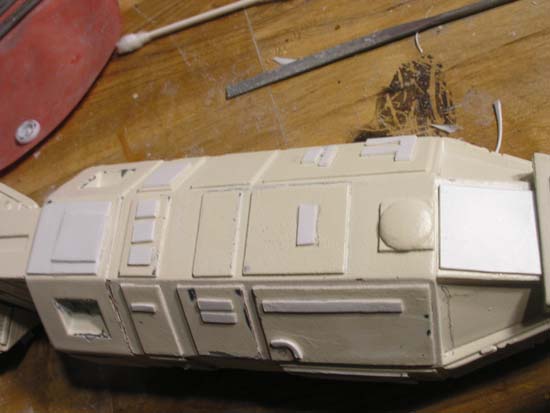
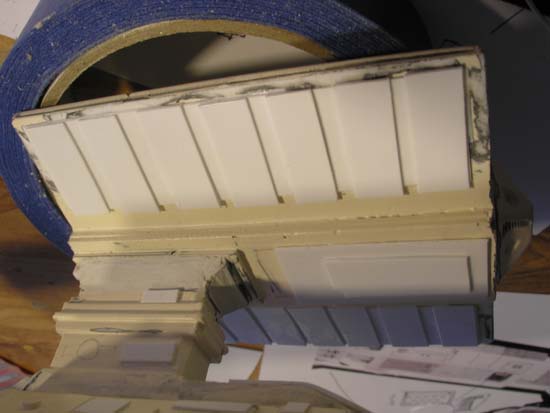
It was then time for some panel tests. It was very tough to get the slices square, but I got a few close and placed them around the body. They're looking excellent and I look forward to doing the rest of them! That will be the bulk of the remaining work involved. I do need to get a new dremel and drill the exhaust port holes in all four recess areas. Then, it's painting time.
1080106.18
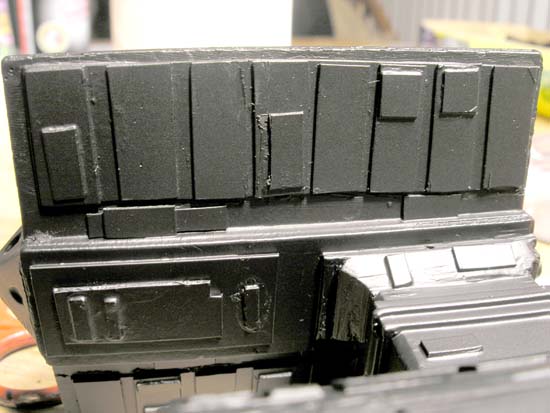
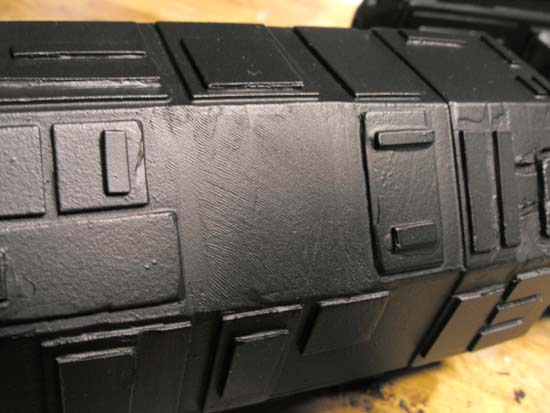
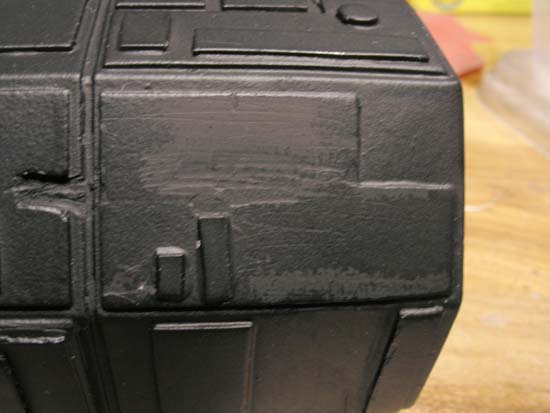
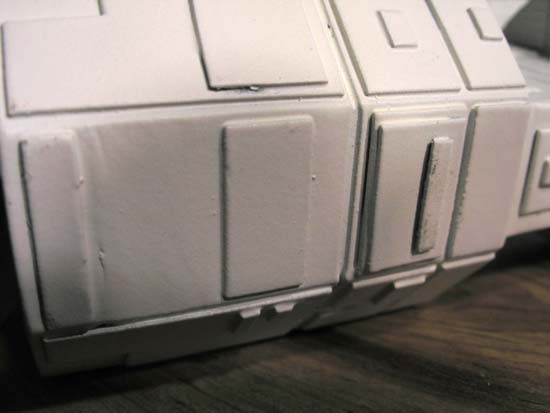
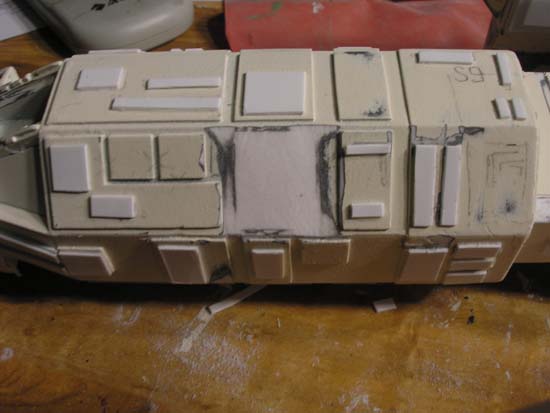
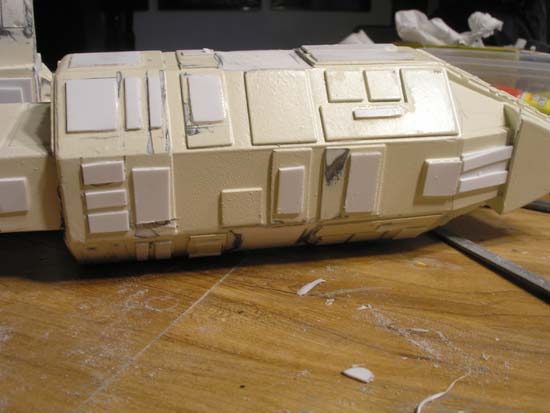
I did a pile of panels last night and for the most part they all look good. The cuts were generally square. However many are off by a few degrees here and there. When I looked at it as a whole, the effect is great! Even from a distance, the look is distinct and makes it all the more real. Though I doubt that it is accurate to the filming model any longer.
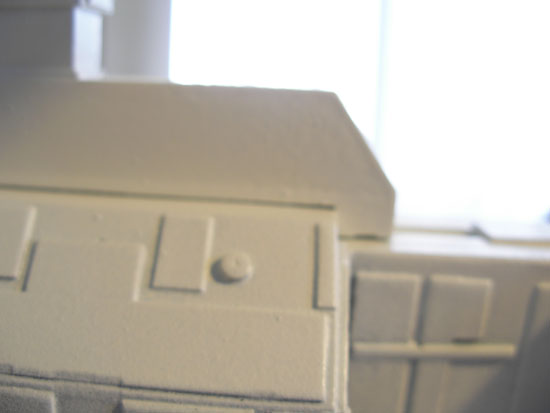
I did most of the rest of the work this evening. I also sliced a few off the natural panels off. The paneling under the tower wings is what I sliced the most off of, overall. Those need to be replaced with eight symmetrical panels on each side. Those constitute the bulk of the remaining panel work at this point. A few tiny more details around elsewhere, but that's about it
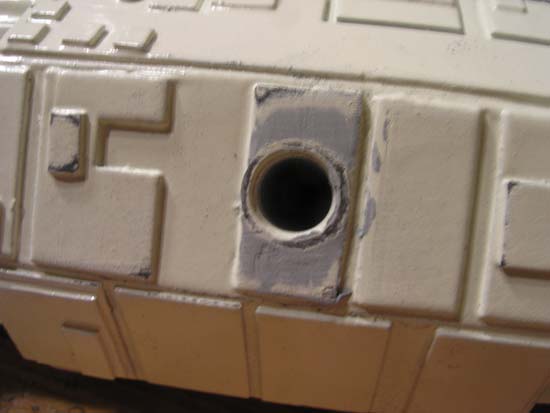
I need the dremel repaired to do the 56 exhaust port holes as well as a single hole through the tower wing to hang the ship. I could also try a noose but we'll see.
The other major piece of work that's needed is around the nose. That is inaccurate and enough as it is, but I will likely not make it better, but as inaccurate as it currently is.
I'm pretty sure that I'm going to go with copper for the long caller on the body.
080107.230
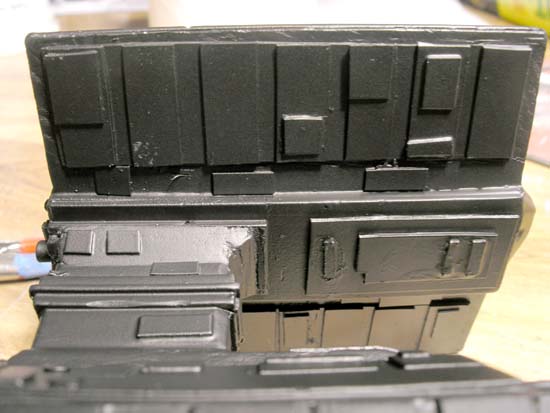
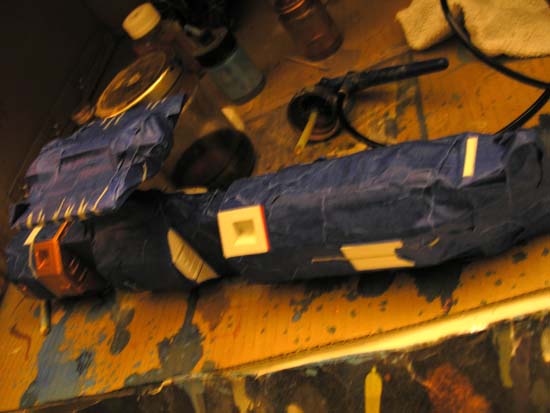
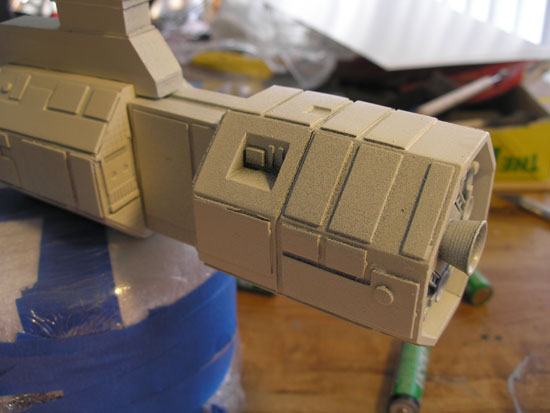
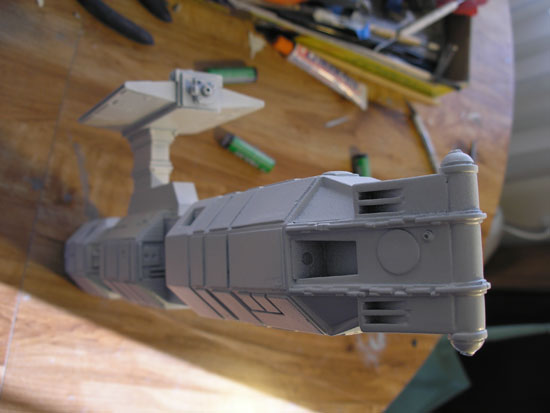
I threw a few final panels on this evening. This morning I had the time to put all the major panels under the tower wings. I screwed up on the starboard side however. While they look great and spaced nicely, there are only seven instead of the proper eight. On the port side I put eight down, but their spacing is not as quite as elegant as the starboard. The scrap pieces I put down (mostly on the tower) this evening really made it look great.
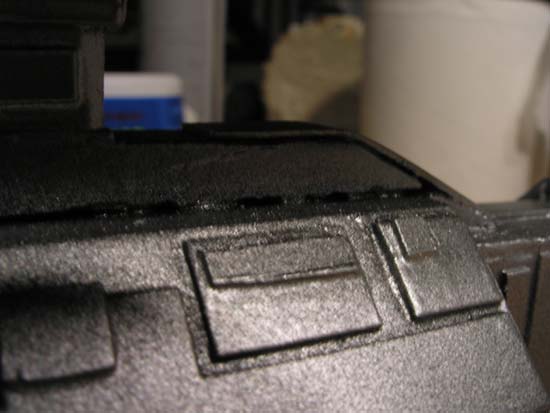
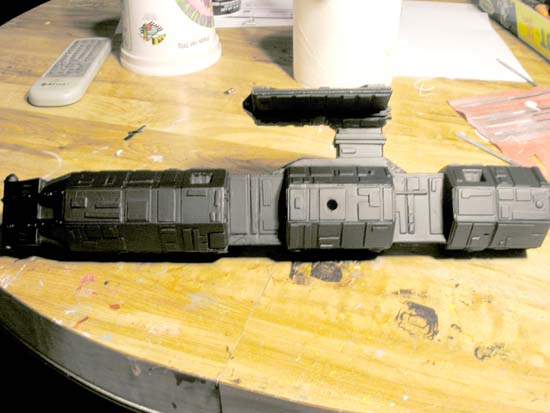
I also had the opportunity to throw down a single coat of black primer over the entire piece. I can no longer tell the difference between my panels and the natural ones. Nice.
However, the primer also brought out a lot of severe problems. I'll have to take a far more detailed look tomorrow night when the paint has time to sit a while. After this study session, I may put on another coat or simply begin working on the surface defects. I have no putty, so I can only sand or file things down. It should be a while before I make significant progress. But we will have to wait a couple of weeks.
080108.20
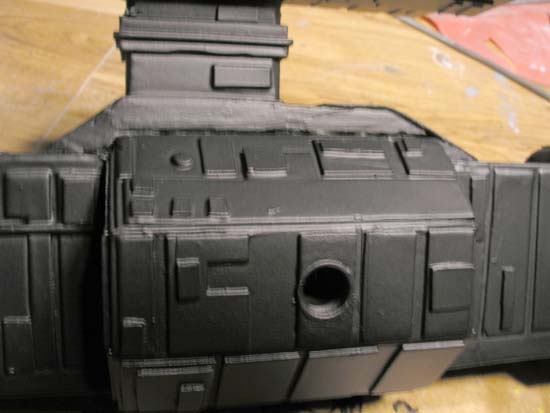
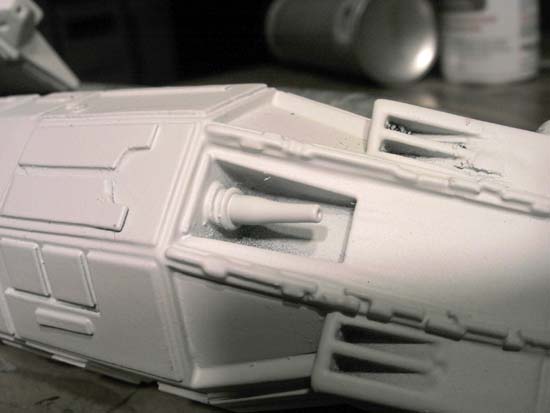
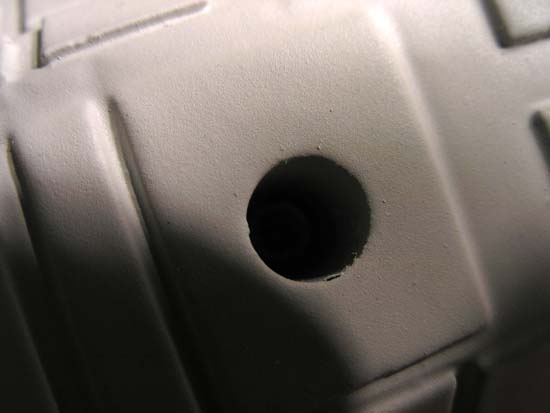
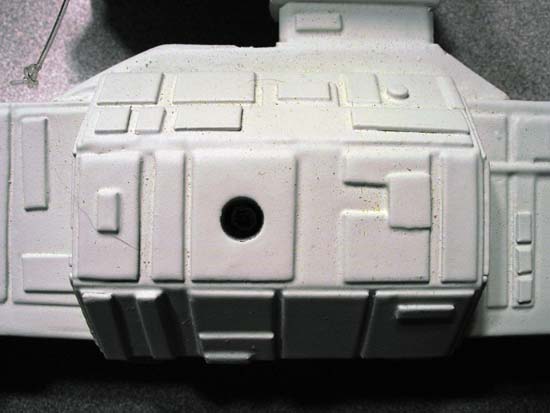
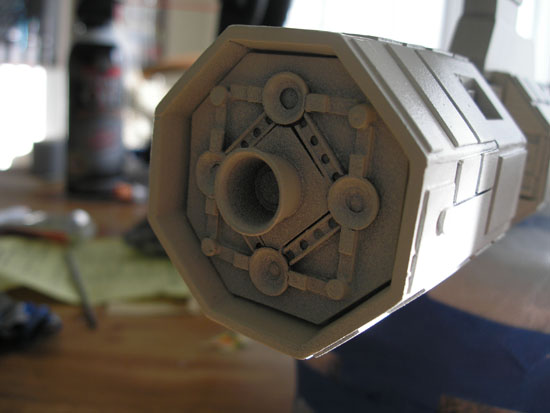
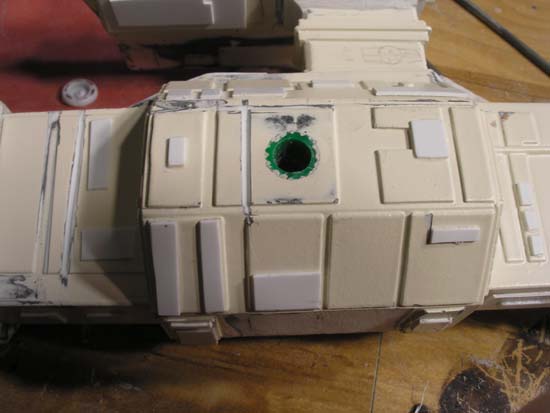
There's a small round exhaust port on the top tower wing. I used a small drillbit -- probably 1/32 with my micro handdrill, boring a little hole straight through the entire wing. The wire I dropped through fits perfectly and the ship hangs at the angle as the film shot. Nothing else until I can do the servicing.
080113.12
I did a bunch of surfacing and painting this past week. See also the WiP page at www..
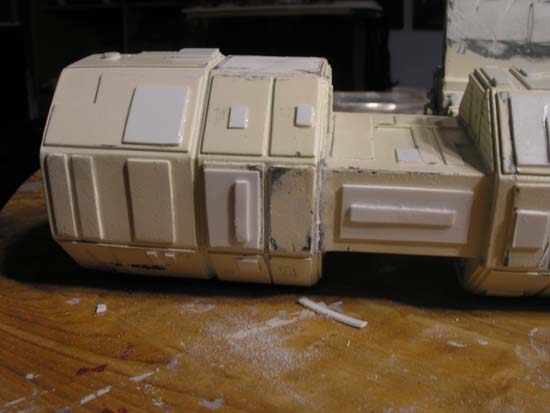
I had the ship balanced and taped off on the top of a paint can while it dried -to keep it off the table. I left and that moment I heard a crash. This fall knocked off the bridge module, unsnapped fore module clean off.
I glued the fore module back on today, straightening out a twist in the length. I also went through a tube of CCA Gel today. I took the nozzle off, sliced it down and glued into the port launch tube.
I also cleaned any paint debris, puttied around a few spots and concentrated on cleaning up the base of the conning tower. It should be good. I'm going to wait awhile more before putting the C%C module back on the tower.
080124.19
More entries at the ODEC forum http://
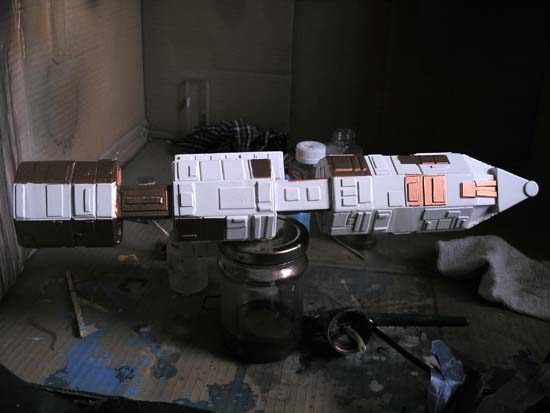
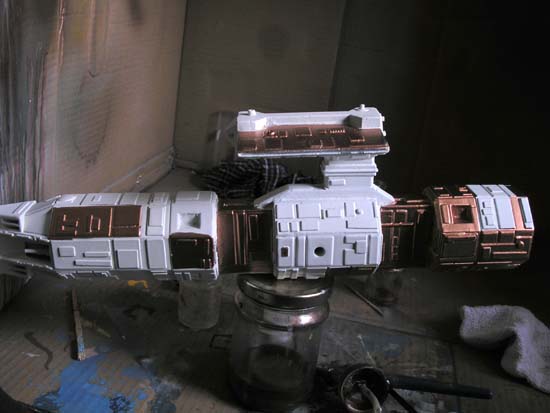
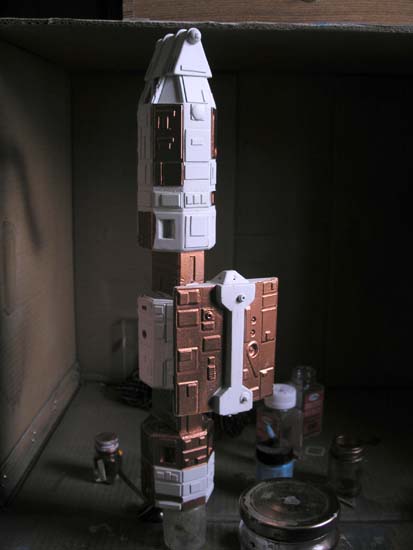
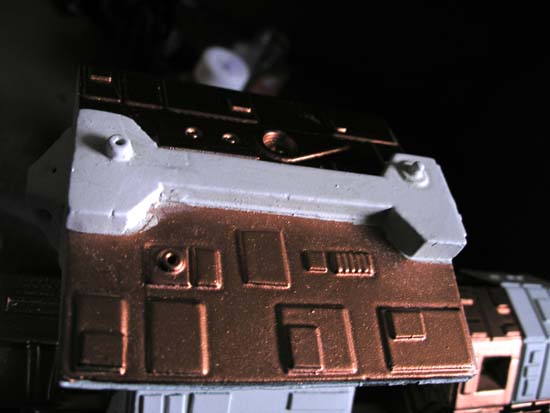
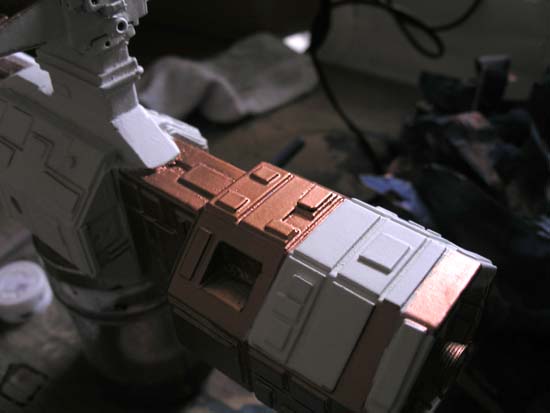
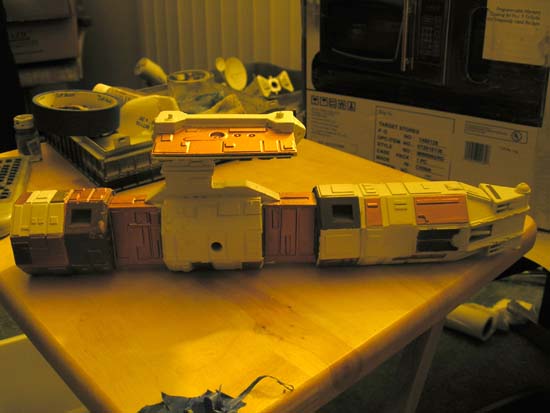
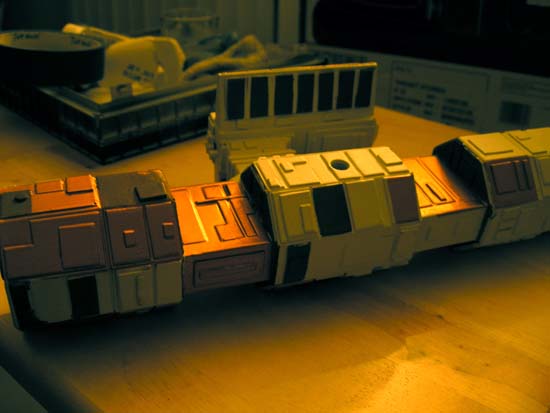
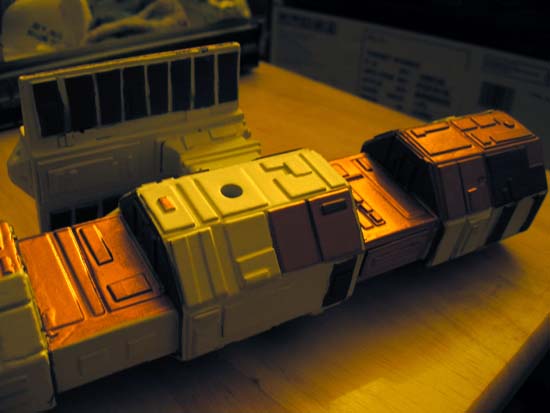
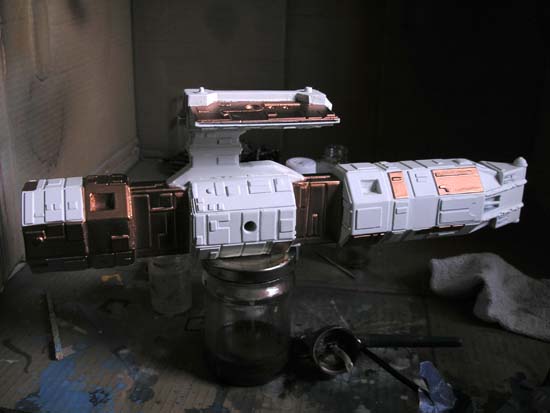
The whole model is assembled. The final base paint is on. Repairs needed along the starboard power base. It will be highly surgical. I still don't know what to do with the nose.
The surface looks great. Any remaining dust hits will be sliced off with great precision. And then that panel will be a shade of gray rather than based white. Need to determine the copper/maroon color scheme as well. It now sits in the airbrush pile.
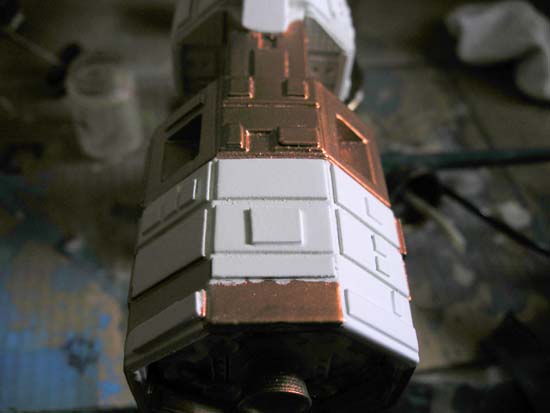
080711.00
Having gotten most of life's annoyances out of the way, I was free to return to the models. I knicked off the Botany Bay in two days and am now on to this one after six months away.
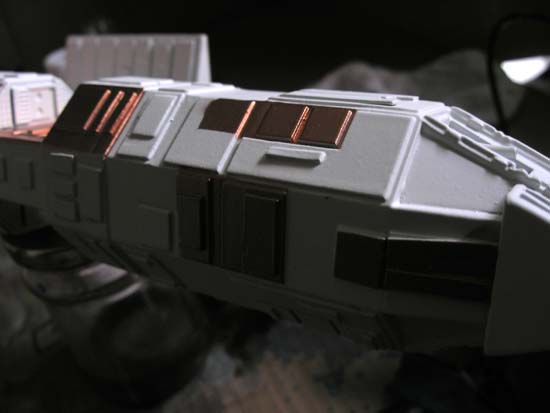
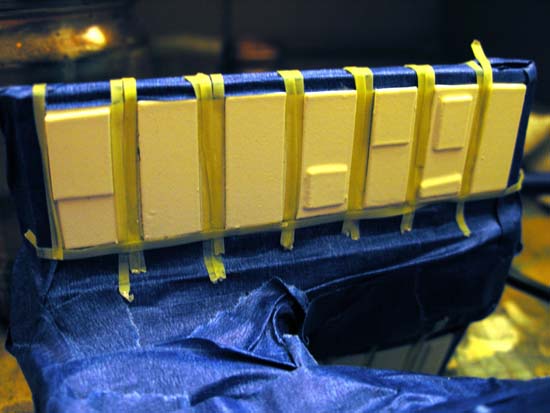
I began this morning by taping the bomb up for a brass pass. I had forgotten how fast airbrushed paint dries. Nice! That went well with only a few touchups needed.
This evening I returned for more painting this time taping off for a dark gray pass. I didn't have any gray so thought I could get away with watery black which did not work great, but was passable.
I tried some minor light brown on the Botany Bay and used the remainder to go over this watery black pass. This gave the overall color too dark a brown and I will be taping the next light gray pass to include some of this too dark brown colors. There are two other passes to follow. One of the base color to repaint some panels that went brass and a bright white pass for less than a handful of panels overall.
I look to wrap this one up before I start my paying job again on monday.
080727
I have to redo all the panels so far with proper grays and a new brass pass as well. Over three passes, the brass just pulled up and it looks old now.
080804
Redid the worst of the panel colors. I have at least two more passes to go. A base fix, white punch, then a brass pass. Done.