Capsule
On Hold
PURCHASED:
070426
BEGUN:
070528
COMPLETE:
CONSTRUCTION
LOG
070426
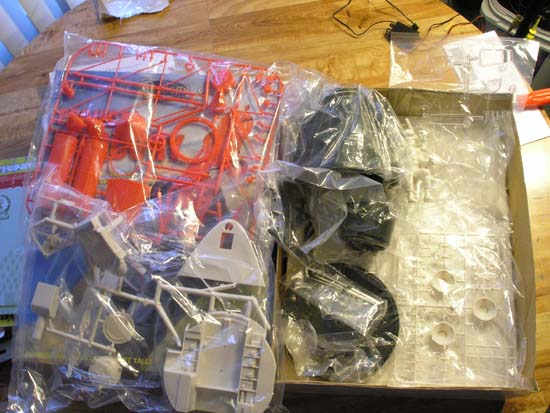
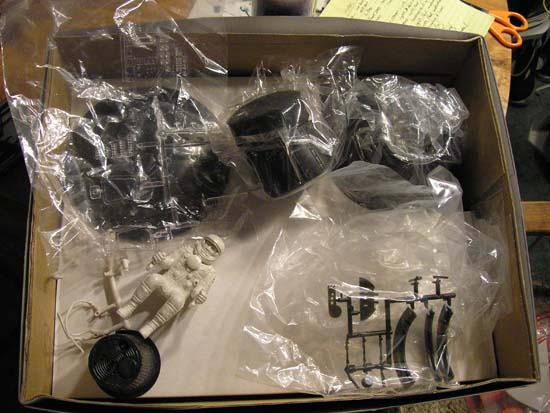
Found this kit the other week at the hobby shop. A bit pricey, but essentially a unique find. Neverminding that real spacecraft tend to be difficult to find in the first place.
070427
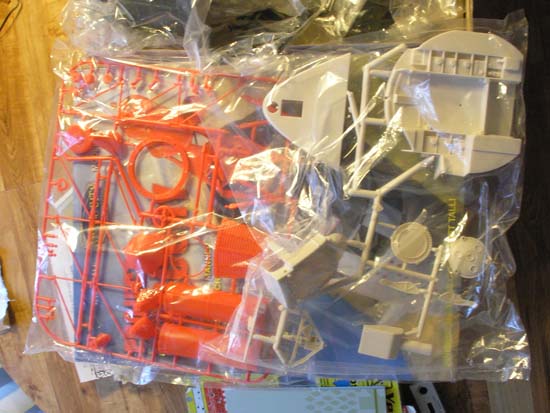
Havng done some minimal research, I discovered that Atomic City is a very small, ultra talented, mostly solo w/ additional help, garage startup.
I'm glad as much of every penny went to the guy. Briefly looking it over, this is a fantastic kit. Other kits from AC are as unique and for the most part, pricier, but ultra quality and worth it for the serious devotee. I'll be there one day soon, and hopefully soon enough to still get some of the kits AC has going now.
070531.02
Began this kit on the eve of the 28th by priming everything silver... That's not quite right. I actually began the kit last month while I was at the L.A. Science Museum getting refs of the Star Wars models while they were on display.
Looking the museum map over I saw a little black capsule and figured. even if it wasn't a Mercury, it would still be useful as a generic reference to see how these things went together back in those days. As it happens, they had two capsules- a Mercury and Apollo!
This Mercury had no name, but is listed as the original craft that launched the chimpanzee 'Ham' on January 31, 1961 for a 15 minute proving flight.
...
I started by saying I began by priming everything silver. Typically when I am dealing with metal objects, I prime silver first so that any scuffs to the top layers of paint will reveal metal underneath - it worked beautifully in this case!
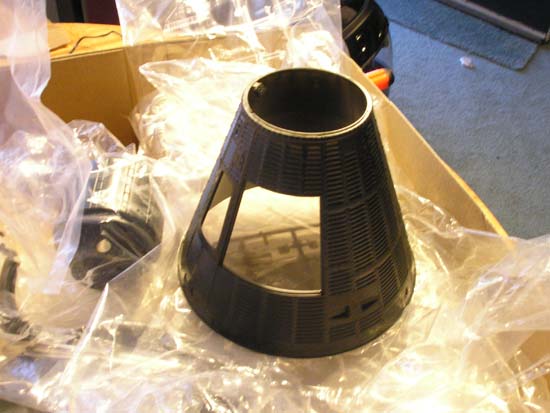
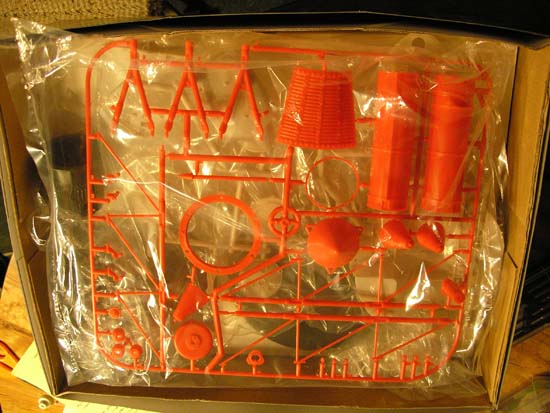
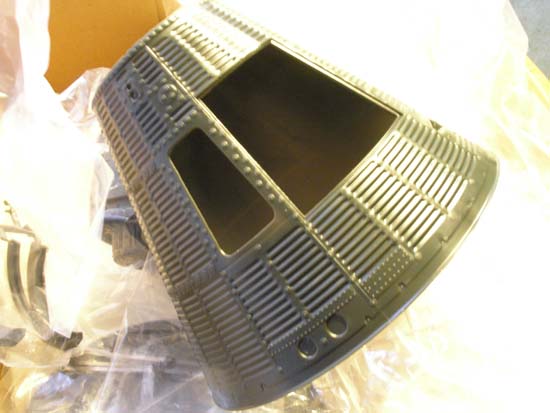
Despite the craft's metal nature, it has a very flat finish, I would guess the re-entry temperatures helped to bake any gloss away. Nevertheless, I'll be keeping this one flat overall. I next went with flat black primer over all exterior parts, a specialty Rustoleum gray for the interior and a red from Rustoleum for the tower. I'll get their names later.
Once the black was dry, I got one of those green scrubbies for dishes and lightly scuffed the surface of the capsule up. This buffed any shine away and gave some nice light texturing. Pushing the intensity a little, I was able to reveal the underlying silver in a very convincing way that I am highly pleased with!
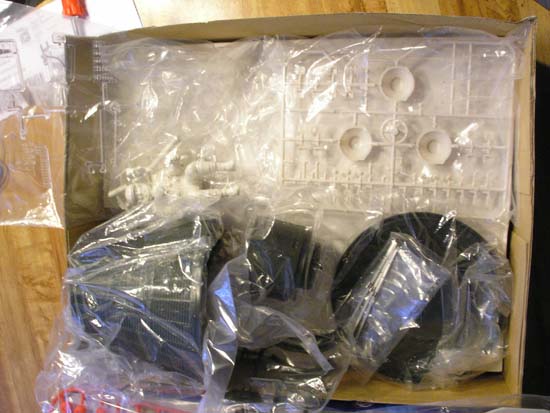
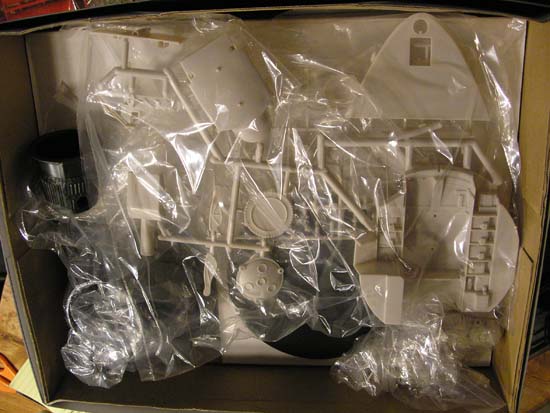
I looked all the parts over and quickly realized that you pretty much have to do the directions in order, with a few ultra minor exceptions. So I put those exceptions together first as the offical steps 1-4 were intimidating on paper -and in plastic.
Here's where my only beef with the kit comes into play. My vision is quite good, not quite the 20/15 it has been for most of my life, but still good. The part #'s stamped into the plastic are near infinitely small. The diagrams of the smallest pieces are also very small themselves. It wasn't a matter of not being able to see properly, but the small size made immediate and intuitive comprehension of what I was looking at difficult for me. Your results may differ.
Nevertheless, after much staring, mild guess work and deductive reasoning, the parts began to go together in order. This process was otherwise relatively easy.
The fit on everything was nice and things could pretty much only go on one way. There were two small 'pipes' on the underside that I snapped after they were on, unfortunately. They glued back together adequately. The smallest of parts had some difficulty in handling, but at that size, it's to be expected.
The tower seems to be the only part that will need any patching whatsoever. These pieces are finely (exquisitely) engineered, however the primer shifted the fitting here and there. So the tower needs putty work at every joint. The seams on the very upper 'tube' self-hiding as they kitty-corner into each other. However when I was pulling the pieces off the tree, the plastic got screwed up at each sprue point and I now have to putty those wounds. Then it's back to more red and those parts will be done.
The underside rocket pack went together well, but I snapped those pipe pieces -and they are delicate, so be very careful here when you build this kit. The base pod has holes for all these parts, but there are no holes on the diagram, this threw me some. But upon careful study, the parts go in in a particular order. As long as you stay symmetrical in your thinking, you'll be set.
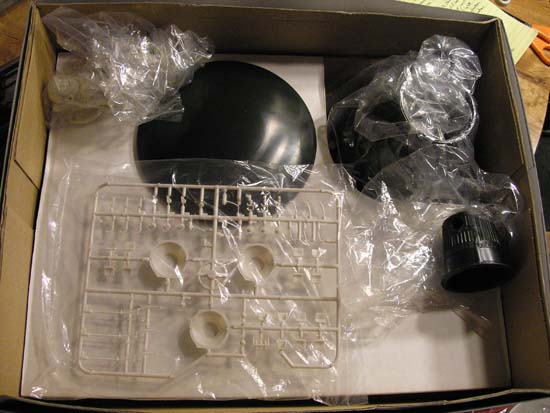
This simply leaves the internal cabin portions. Reviewing my reference, the included control panel is likely highly accurate - I still have as yet to remove those pieces from their sealed bag as they are transparent plastic and I don't want to scuff them inadvertently.
However, the overall detail of Ham's cockpit compared to the kit's is so overwhelming, that I may just seal the hatch door on so that the interior is only visible through the window. There must be miles of cabling running through the interior with all sorts fo bumpy bits protruding everywhere. That a human actually fit into one of these capsules astounds me! It's no wonder that the pilot's said at the time that this craft 'wasn't so much flown, as it was worn'. This ship is truly a 'tin can'.
Perhaps the other craft interiors got simpler over time, but without detailed photo docs of the later craft, I cannot tell. I will contemplate faking the interior with lots of greeblies and spare wire as this would be truly hot, but we'll see on that...
I'm going for Glenn's 'Friendship7'. My first and lasting thoughts were to go with Grissom's 'Liberty Bell' to honor his memory, but decided somehwere along the line to go with Friendship as it was the first manned American craft in orbtial space. The first two flights were suborbital tests. Shepard's suborbital flight showed that it could be done, then Grissom's proved it could be done. If I come across an Apollo module, I'll do Apollo 1, as that is the one in which Grissom, White and Chaffee lost their live's in a training accident.
Back to Mercury...
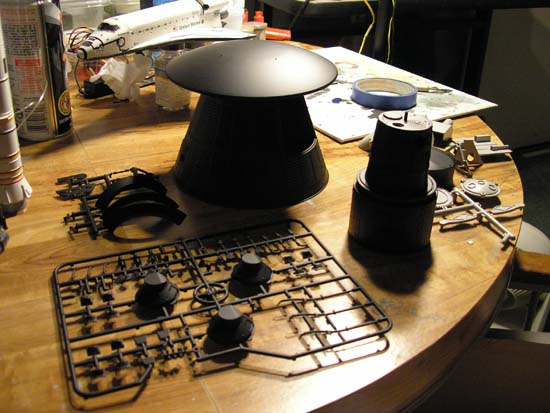
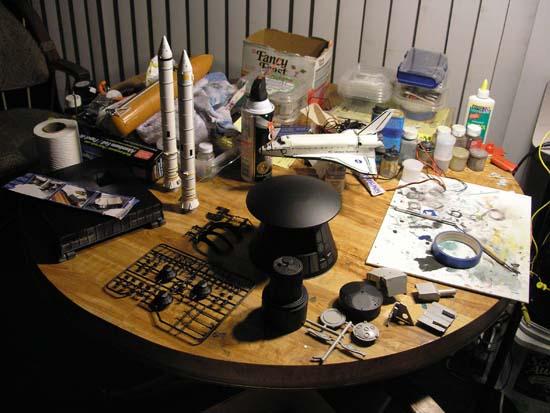
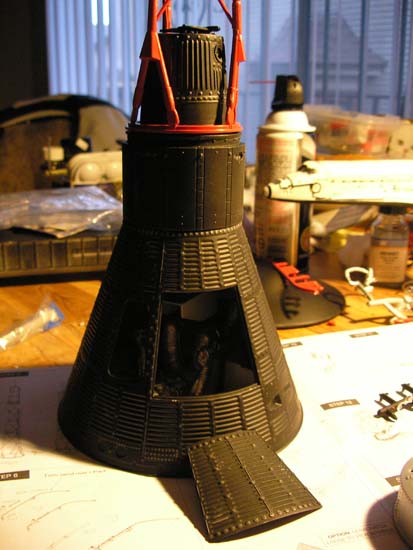
I briefly test fitted all the assemblies and this thing is huge! Two feet is two feet, but when you see it in front of you like this, it's nice. Were I to make a Redstone 2 rocket in scale, this thing would likely be 15 feet or taller!
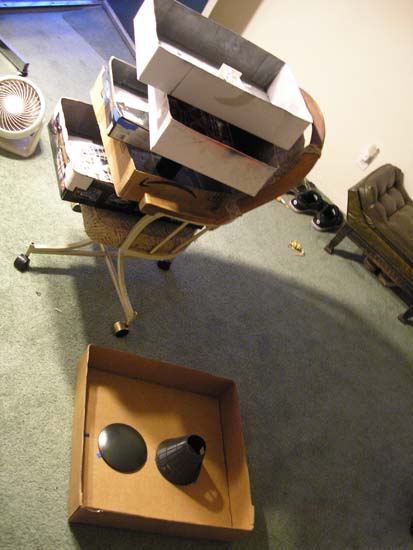
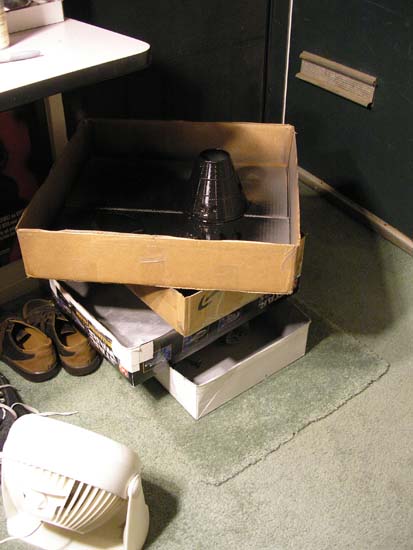
This is where the kit stands now. All subassemblies are complete. Putty work on the tower, painting on the interior and final assembly and this kit is done. Apart from... a stand!
This kit cannot simply be stood up due to the detailing on the retro pack on the bottom, or if removed, the curvature of the heat shield, neverminding the the top heavy tower. It cannot be laid down on it's side as it would be too delicate for it's weight -and it would roll at the first opportunity.
A custom stand is in order. I like the pictures of the kit on its' side and am thinking that a cradle of some sort is the goal.
Lighting = Yes.
First I thought 'naw', even though the kit is rigged for it. Then I thought 'yah' for awhile. As I was building it last night, I thought 'no, and that's that'. Now, upon looking at the ref's and thinking about it, the craft does need at least one (maybe two) white led(s) on the inside to show off what's going on in there regardless as to whether I seal the hatch or not, whether I detail the cabin or not.
I'll work out the wiring as I get further along and begin to see the cradle/stand come into existence. And, essentially, as the kit cannot go to final assembly until it has something to rest on, I'll have to start this aspect sooner than later.
070531.08
I did a great job filling and filing down the putty patches on the upper tower. I stepped outside to spray a new coat of red and call this part finished when the paint started blistering almost instantly. I ceased spraying, but it was far too late. This beautiful part was now ruined.
I filed some of the blistering away, but the paint was still too thick and wet and made things worse. I've put the whole kit away for the moment as this episode was too depressing to deal with after also having an SRB from the Space Shuttle pull a similar trick. As mentioned on that page for this date, my best lead is that it is a temperature differential going on.
I do all of my spray can spraying out in the back parking lot of the apartment. Going from the wamer inside to the windy colder outside must be a primary factor responsible for this nightmare scenario. However this does not explain why the other SRB, done moments before in the same conditions, did not also blister... I painted the tower red immediately after I glossed the SRB's.
This repair is going to be a nightmare as there are exceptionally small molded details that must be preserved on this piece. Also, the original smoothness of the piece is now compeltely destroyed. There will be no way to get that surface back again, short of getting a new part.
As I said, this kit is put away for the moment. The cockpit details are another factor for a momentary hold. All the parts are advanced enough to be at a good place to pause, but not advanced enough to be in such a delicate state as to warrent finishing everything off.
To do:
Cockpit -details, decals, lights
Pilot -paint suit details and face, attach hoses to suit.
Heatshield -straps must be attached to the retro pack, minor parts finishing and heat shield paint.
Tower scaffold - putty seams, repaint.
Tower tank -full resurfacing and new paint.
Final assembly and decals.
Craft a custom stand/cradle.
i'll get back to this kit next week after I have finished repairing the Space Shuttle and also taken a brief weekend vacation.
I would really like to call this utterly complete before beginning another round of work on any models whatsoever. However, as the Imperial Base diorama is purely electrical work, I will fiddle with that some in the meantime as that is the only thing stopping that piece from being finished.
070608.02
As I've worked on the Imperial Base -and now the Med Bay over the last week, I have generated numerous bits of waste wires and such that will be utterly perfect for interior cabin details! I have been dumping this garbage into the kit box every other day as I tidy the work bench. This is going to look real, real good!!!
I need to get back to the Sci Ctr to get better reference photos of their capsule before more work is done -esp the interior!!!
Also, I have scraped 'Friendship 7'. Two things caused this change of mind.
1st: Every shot of this model I've found on the net is Friendship 7. No one seems to have done any other of the 7 capsules. Disappointing, but I'm going to be 'original'. It's back to Gus and his LIberty Bell
2nd: I was scanning the decals for my files and began to truly study them. I noticed that the heat strips on the underside retro pack really need to go before any of the attached pieces. It would be an utter nightmare to get these on accurately with all the nobblies in the way. Truly a nightmare. And as I had crazy glued the pieces down, there is little chance that they would pull up again w/o being angry about the situation.
So, it was the LIberty Bell afterall. She, nor Shepard's capsule, had these heat strips as they were both suborbital craft. The retro packs were a simple silver. Psyche!
Just the other day, thinking of this craft as Friendship 7, I came upon a unique notion as to the cradle/stand for this piece.
A pile of cotton balls and wisps painted and sculpted into the shape of reentry fire! Wicked! Now I don't know if it's all that great with Liberty Bell as she may not have gotten that high -being suborbital and all. I'll have to research that. If so, then this will look awesome! Potentially, I could do the Shuttle trick and put flicekring orange lights in the cotton to simulate fire. Whether this would be a genuine fire hazard remains to be seen. I know a costume lady who could better inform me on this whole idea...
071223.23
With the completion of a number of resin kits, it's time for Mercury to make a comeback. At the very least, I can do some painting and greeblie up the interior cabin. I need some orange for the heatshield. I also need to consider: lights, gluing the tower on, a base or stand.
080218.00
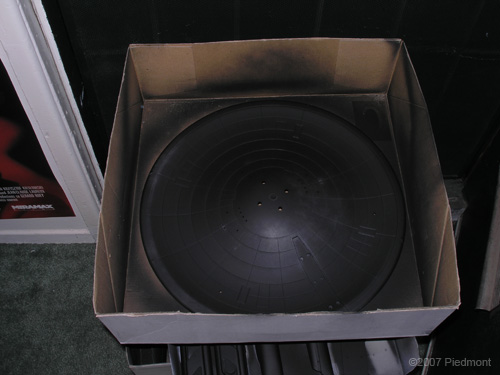
While painting a bunch of other stuff, but brought this one out and painted the underside, giving it a dry brush of orange. It needs a few dry layers to give the texture. Next is a sienna, than some yellow, more orange, a dark brown, etc.

