Antenna
Module

Final Paint
PURCHASED:
071027
BEGUN:
080127.21
COMPLETE:

CONSTRUCTION
LOG
071104
This kit was released once before, a few years ago for a limited run. As with the XD-1 Command Module, this is the exact same section as the Captain Cardboard 11 foot Discovery that is sold for nearly a quarter of my yearly salary!
When I first found the AMK early this summer, I thought it was okay, but wasn't worried about missing it by a couple years. A few weeks ago, several of the folks who got the CMK were talking about it and I gave it another look. I realized that it is, in fact, a pretty cool piece. A week later, a limited second edition was issued and I grabbed it within the hour of its announcement! It's being poured 'now' and will likely arrive before the CMK does.
I await with eager anticipation.
071110.20
Theoretically, it's being poured last weeka dn this week and should be here imminently. TGiving at the latest.
071118.14
The hold up is not with the Antenna, but with the Pod mold. It needs to be redone. The next week or two the first should ship.
071224.22
I'm strongly considering assigning 2 additional pods from the CMK.
The scenario is one of assembly/transport. One holds the base, one or two others hold the antenna proper. They would all be hardwired to the wall mount. Through a brass rod. I would wire all the pods to one master switch. 12 white lights, plus three interior lights. Interior can have two tri-color LEDs alternating blinks and with one full-time red, maybe a yellow/low-power white. If too heavy for the tube, I would reinforce with a metal bar as well. I will use the same 18 inch pine rounds as the CMK and Aries will be getting. They are at home depot for about $10 each.
080124.22
I found an e-mail earlier this evening that my kit went out this afternoon. I'm still stunned! It seemed like forever ago, but it was only almost 3 months to the day. I'm excited and trepiditious to see it! It should arrive at work on Monday. I'll have to get down to Home Depot and pick up the pine round bases I have in mind for this and the CMK and the eventual Aries.
I will need to buy them all at once as they could sell them out or de-stock them -if they haven't already. It was back in the late summer since I've been there now.
I suppose an inspection and clean up followed by primer, putty sanding round. The pods I expect to hold off on until the end. They will be lit!
080127.21
It arrived Friday morning. I picked it up and had a quick look at it while at work. The whole thing went together well. I got it close, but not quite. I put it away while I'm doing a major housecleaning, including taxes and receipts...
I should have it washed and dried by the end of the week. I glued a lot of it together for major spray painting. Then it will be all finesse. I will have to watch the film soon -while working on it in fact...
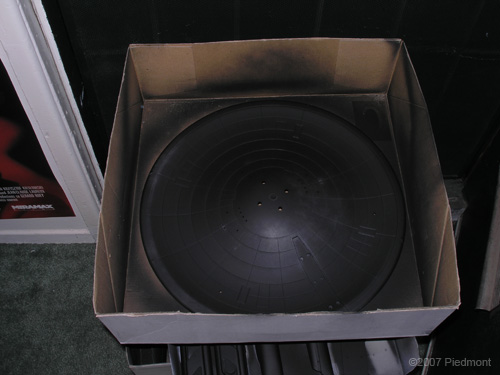
It should be ready for priming this weekend. I picked up a few cans of black in preparation. I think I'm going to try the Canvas White for the body and Primer White for the dish. It will depend on tones. If it is not good, I'll go with that 7%-10% gray for the body. The dish is distinctly white compared to the module.
Wiring the pods is going to be lots of fun! I see four headlights plus three to five interior lights each. Flashing tricolors for the panels will be great. Two red lights plus panel lights. So that's cramming 7 to 10 LEDs in this egg-sized pod. I would run the wires out the bottom and down a brass tube into wall mount with a power switch there.
All resisters will have to be soldered much further down the chain than at the diode anode point. Schematic to be scanned
If that weren't enough, I'm thinking of sizing down Paul's interior pod design. It's a matter of detail and the ratio and printing on card stock and transparent vinyl.
This is a cool kit. Not as big as I figured, but at 11 feet long, it must be right on. The CMK may be very well right behind in the production line.
The AMK. will go fast overall. It is the pods that will take all the time. I will have to get the pine rounds from Home Depot very soon. Assembly will be fast.
I will drill an axle into the dish base for holding it in place, and allow removal or alternate setups down the road.
I am likely to use up to three pods on this kit. That would leave one for the pod bay when the CMK doors open. Setting up one pod with a plug in the bottom so that I could slot it into the landing pad. Some kind of fixed contacts would be best rather than a jack to set up. The more aesthetic choice anyway. Setting the pods on brass rods could be a trick after all.
This is going to be a lot of fun. I'm guessing that the pine round will be painted black. However, giving it a deep oil Brown would be classier...
Maybe...
Three kits. Three rounds. All different.
AMK -- black with stars
CMK -- deep brown stain
Aries -- as the moon base landing pad, but circular.
Each will require progressively more complex drilling. The CMK will allow for lots of internal wiring power and doesn't need much out of the pine round. And there will be less drilling than the Aries base which will require individual holes and pads throughout! The AMK base will be more varied than the CMK, and as interesting, but not as complex a wiring diagram.
Once it is all final paint, I will study the dish base for colors -yellow and red warning labels. I will toothpick those down and then do sporadically all over the body to represent various patches and such. It will be important not to go overboard on the whole thing. Restraint will be the better tack to take overall. I don't know if there's much else to detail. The paint will be the standard black, silver, light black, white to proper density.
I will go black, silver, white on the dish because I want a metal feel to it. That is why the extra black coat goes on the rest of the body. WWW CMK15
080129.22
I washed the kit last night, gluing most panels and the tombstones on the body. I reassembled the parts for a quick build -this time with correct placement of all parts. The first time, things were out of place. The proper way is more stable. However, it will still require the central rod for looks.
This evening, I blacked all the pieces up to twice on some. I was also able to silver some key parts as I had very little left. The dish mainly, but other non-module pieces including the pod. And finally, I was able to do pure white on the dish and its arms. One side, that is. I may be able to do the flipside tonight. I'm pretty tired.
If I weren't doing an interior of the pod, I could do all that together now. I do need to do a white pass on it as well. It sits silver. It will be pure white, like the dish.
I have some Canvas White, but I don't think I have enough to do all the pieces well enough. I could go for a couple just to get an idea I suppose. The pod is the hang up on this kit. Otherwise the whole thing could be done in a single day.
080201
I put down a clear gloss yesterday. It went perfect, except on the face of the main dish! The cracking has diminished as its dried, but the paint is likely ruined. I got to get it off of there somehow.
080203.23
I repainted the model black, and primer whited again. All the modules now match. I went heavier on the outside to the other modules and they look much better now. I was able to sand down some of the dish cracks, but there are still many. I'm hoping someone at the forum will have a salvage option for me. I am almost ready to glue some modules onto the support blocks.
080204.23
I need to get a tube with a central support before I glue the blocks to the modules. This will keep the blocks true to each other.
080212.00
I sanded the dish down some. I gave all the outer pieces a more white paint. I still need a central rod before assembly.
080213.23
I picked up a broomstick which was too thick. I also got a hollow aluminum rod. This is close but slightly too thick as well. So my option is to bore out some of the connector centers to accommodate the rod.
080215.2330
I attended the axle using a toothpick. It's a nice fit. I glued the dish on the mast. Nothing else is glued and I'm happy about that.
080218.00
I put the antenna spike into the dish.


